iOS 17/18
Our normal business hours are Monday - Friday 9am - 5pm EST.
If you have a true business emergency related to your website after our normal business hours; please email urgent@legendwebworks.com.
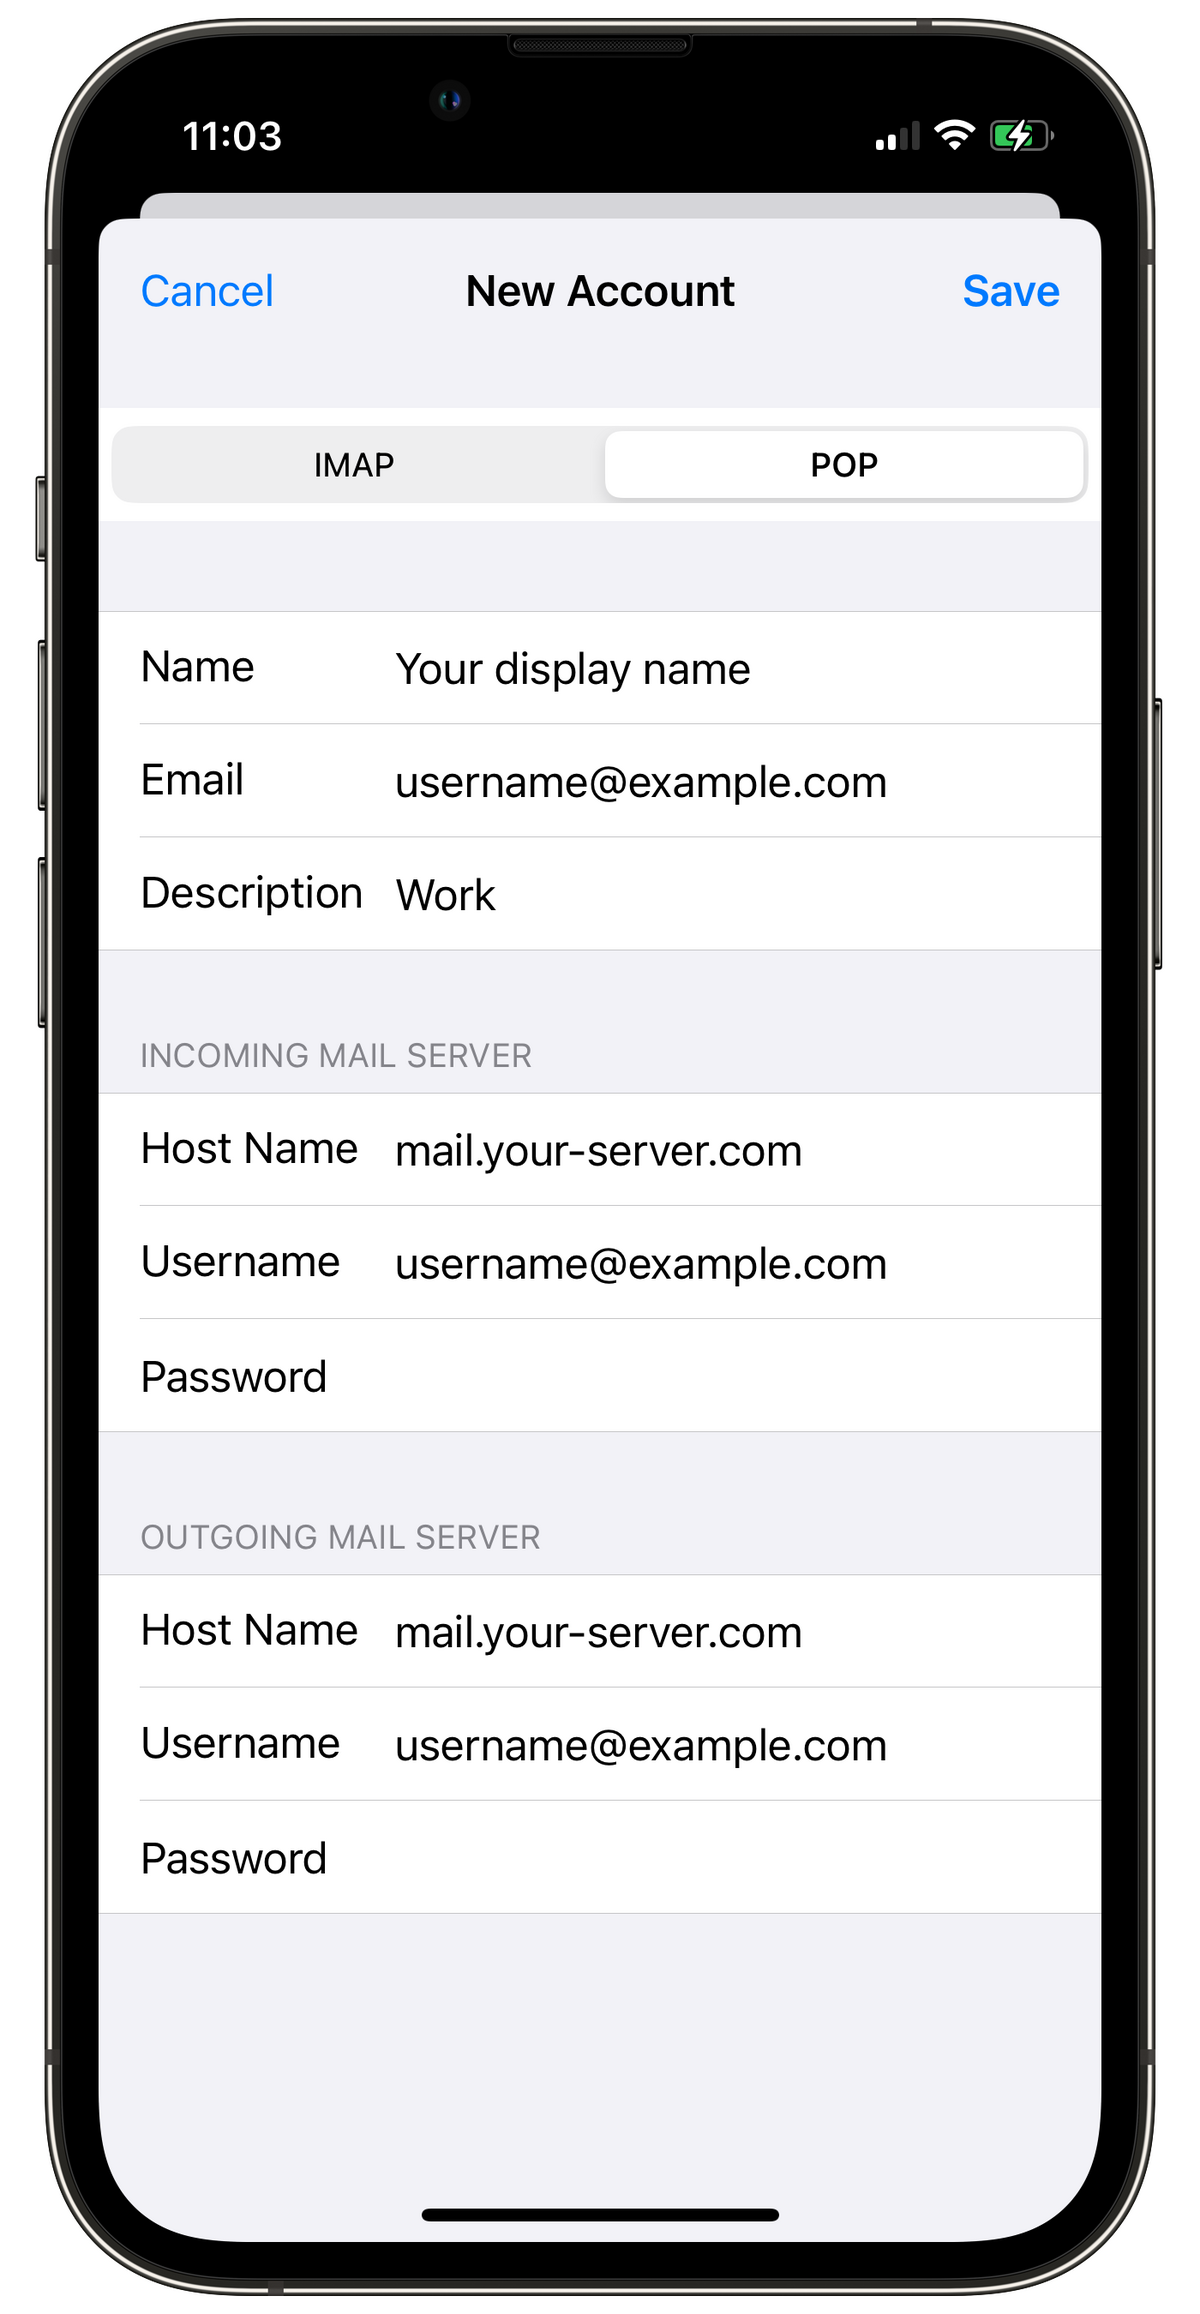
Apple iPhone iOS 17 / iOS 18 (IMAP & SMTP over SSL)
To configure your iPhone for sending and receiving emails using IMAP and SMTP over SSL, follow these steps:
Before You Start:
- Email Address: Replace username@example.com with your actual email address.
- Server Host: Replace mail.your-server.com with your server's host name
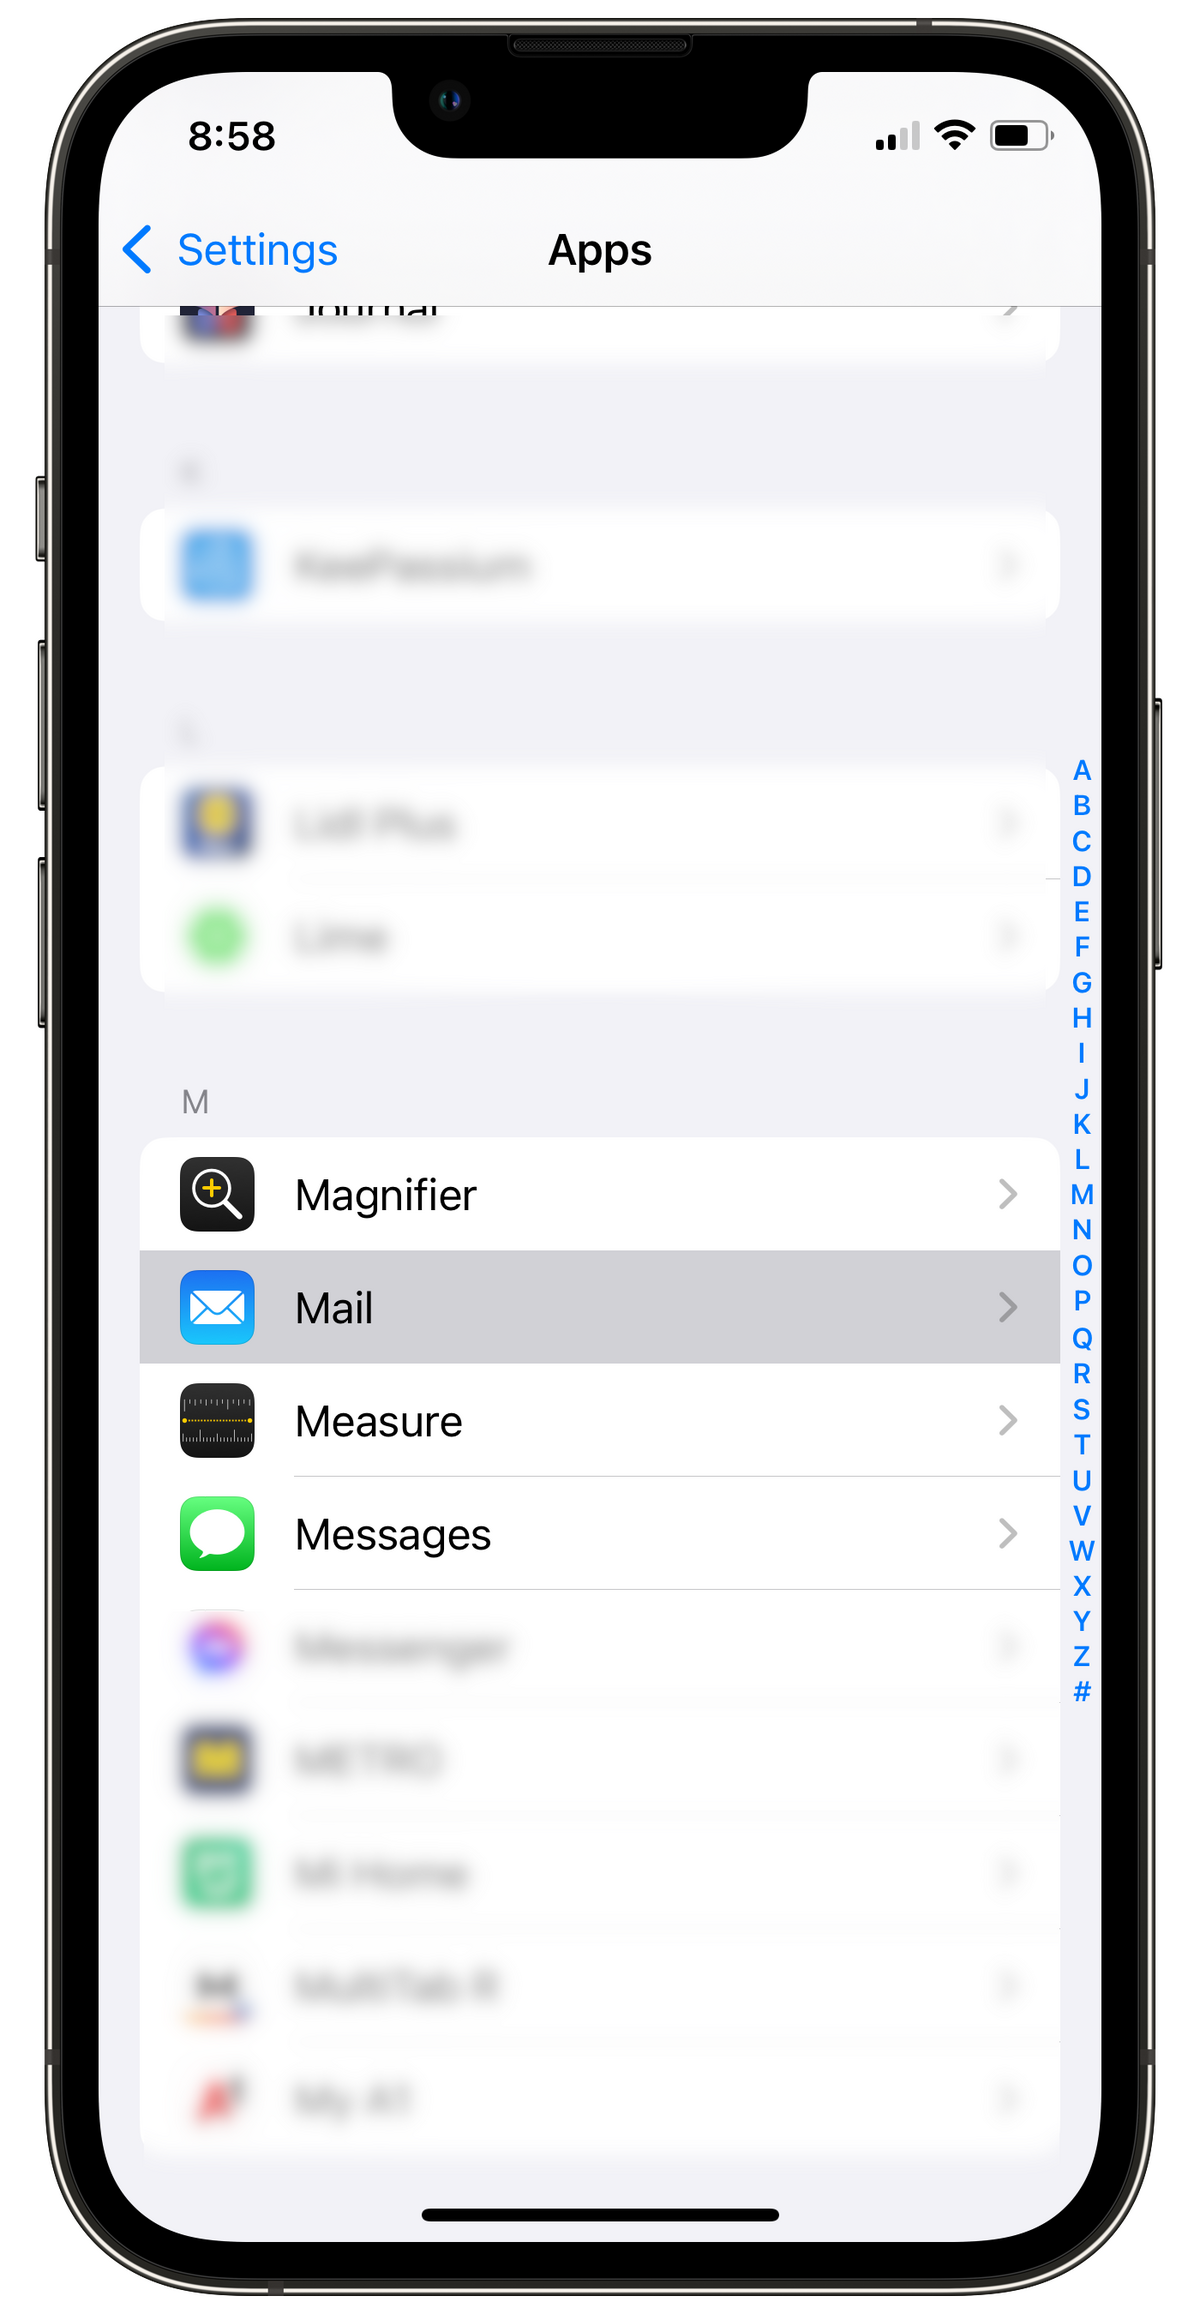
1. Add a Mail Account:
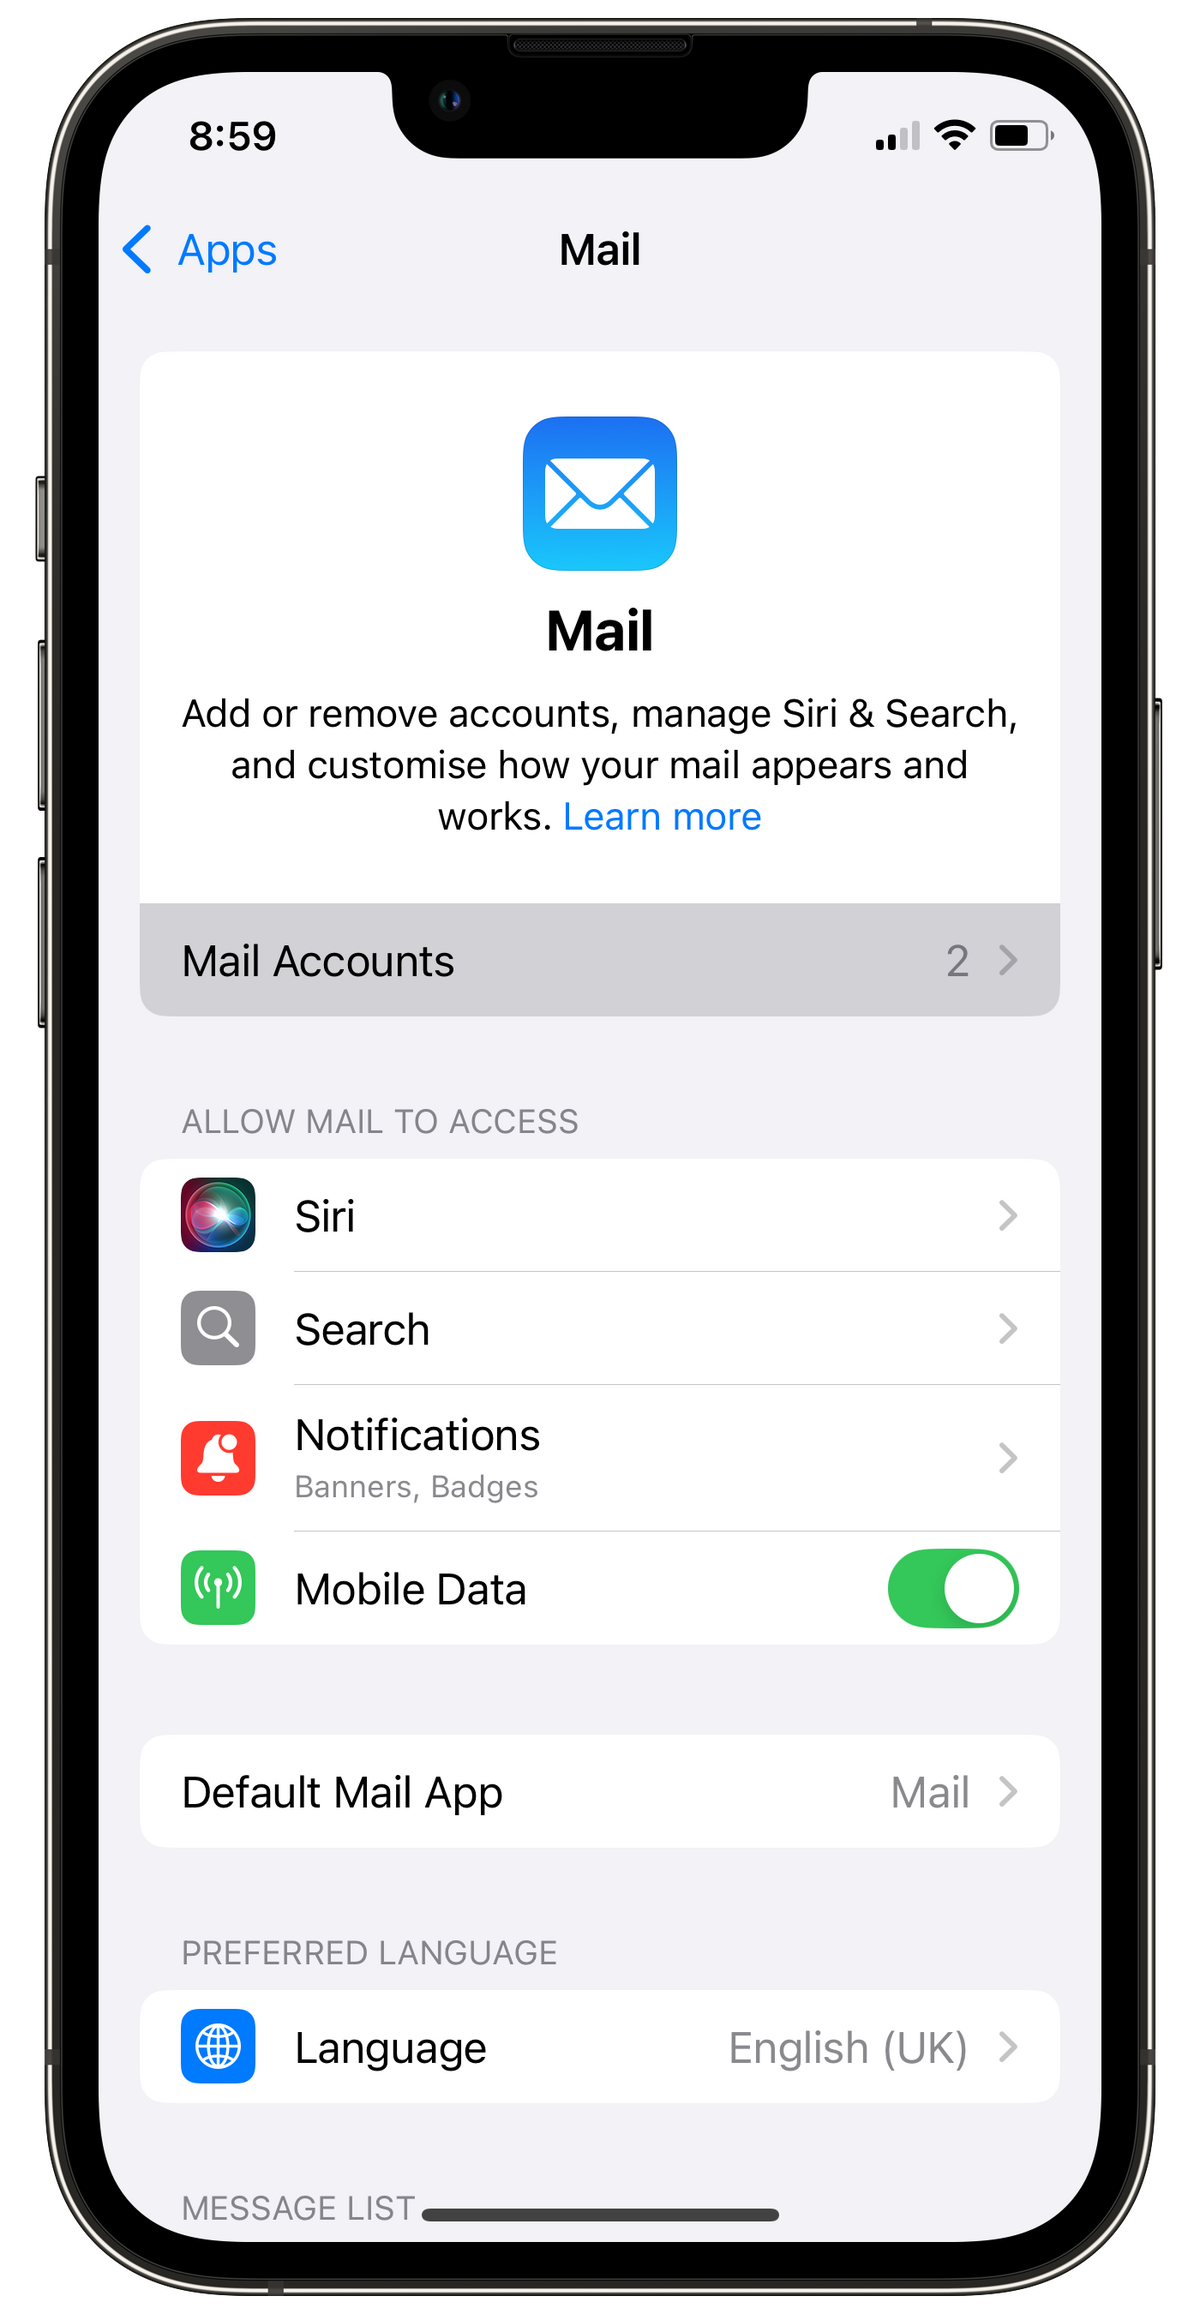
- Go to Settings > Apps > Mail.
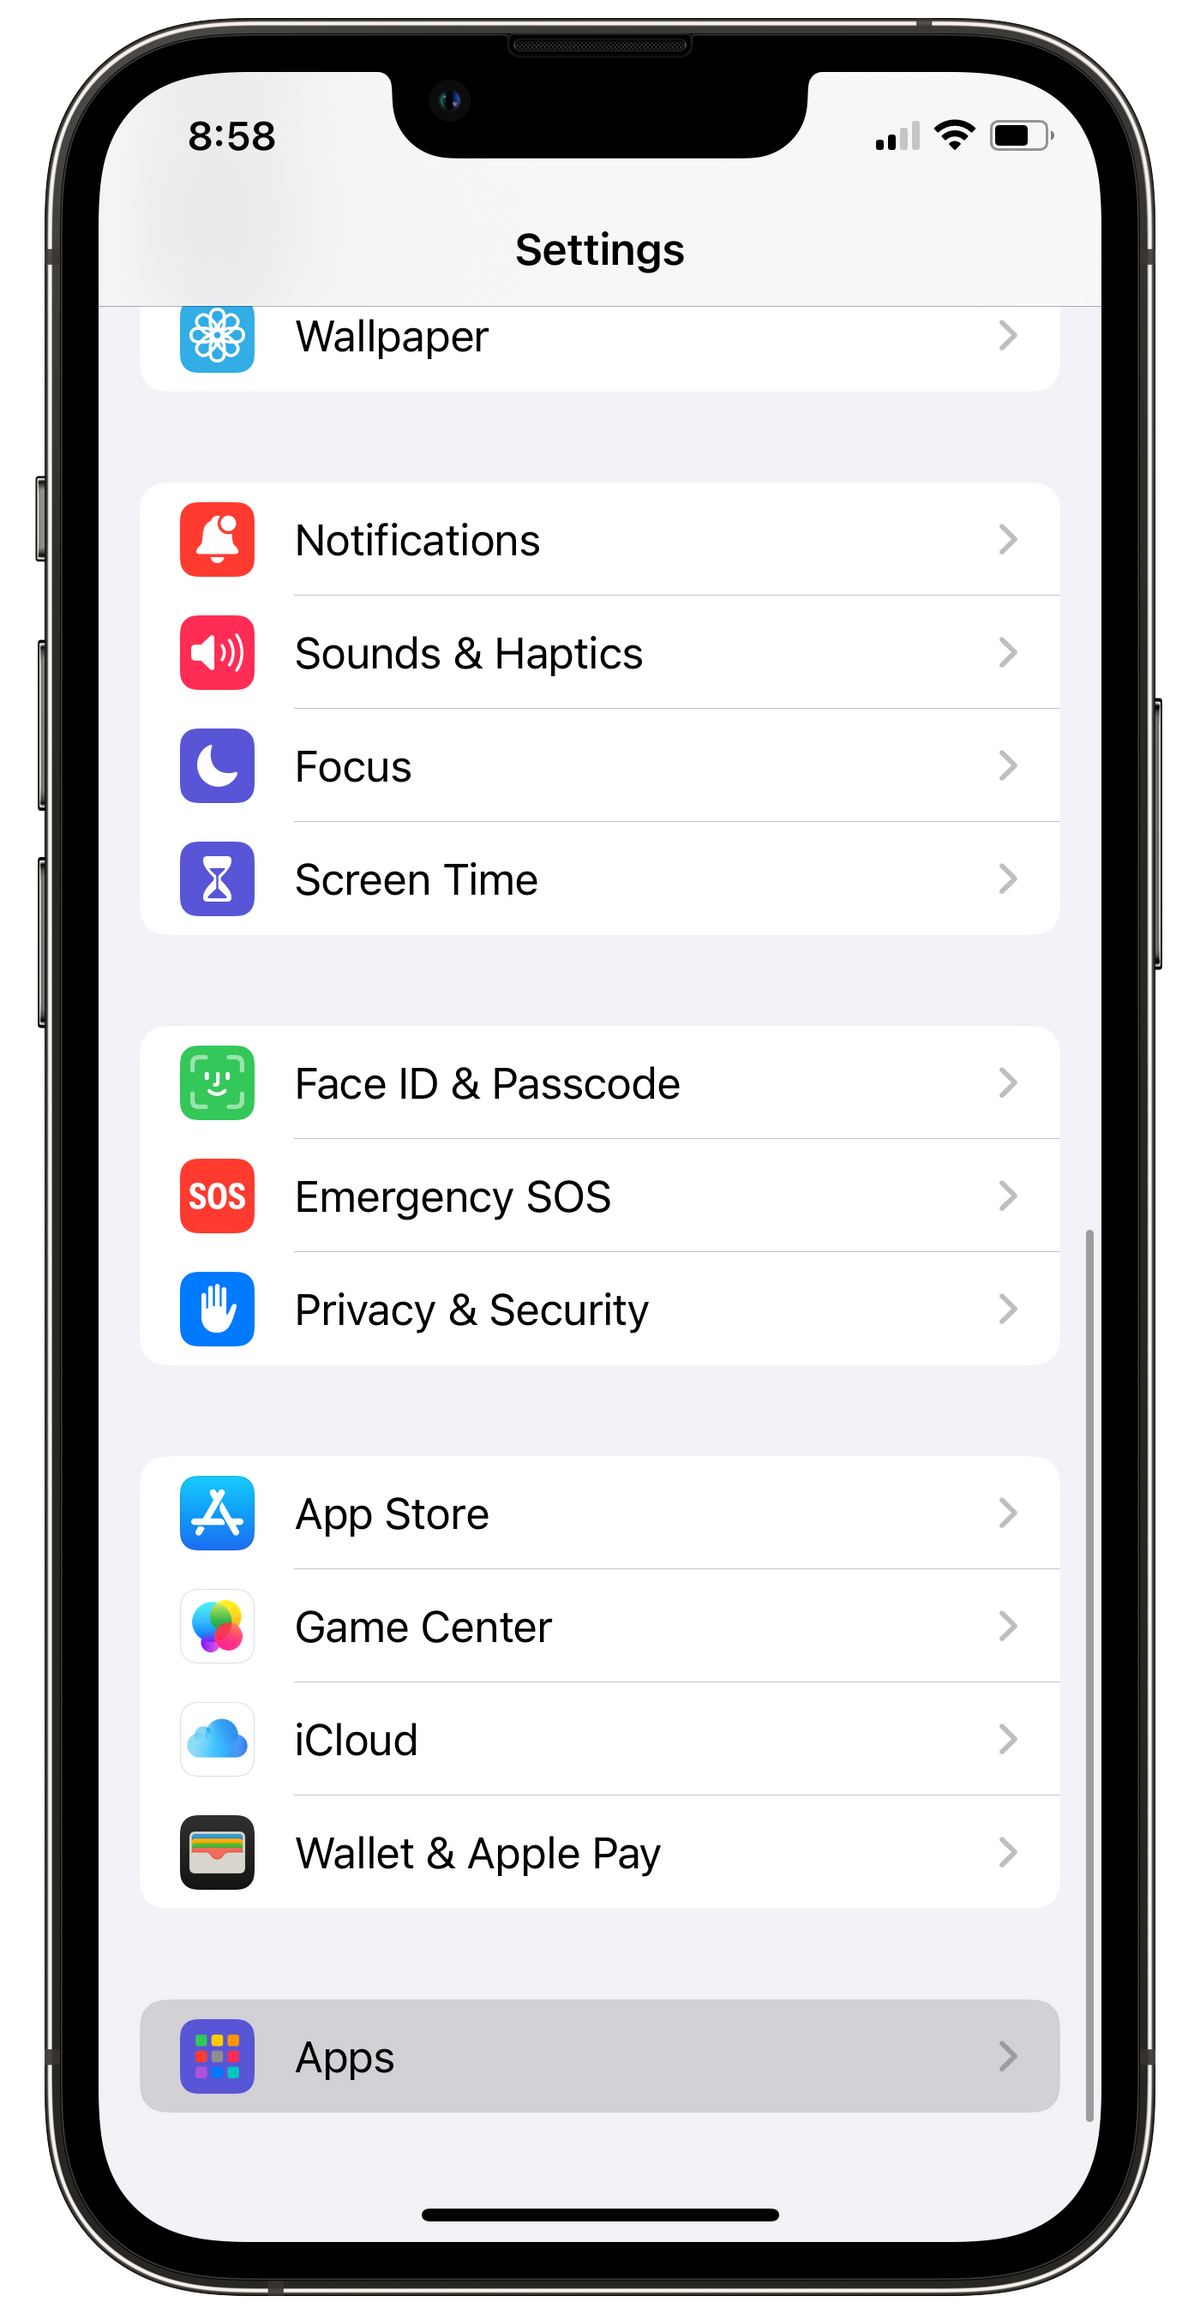

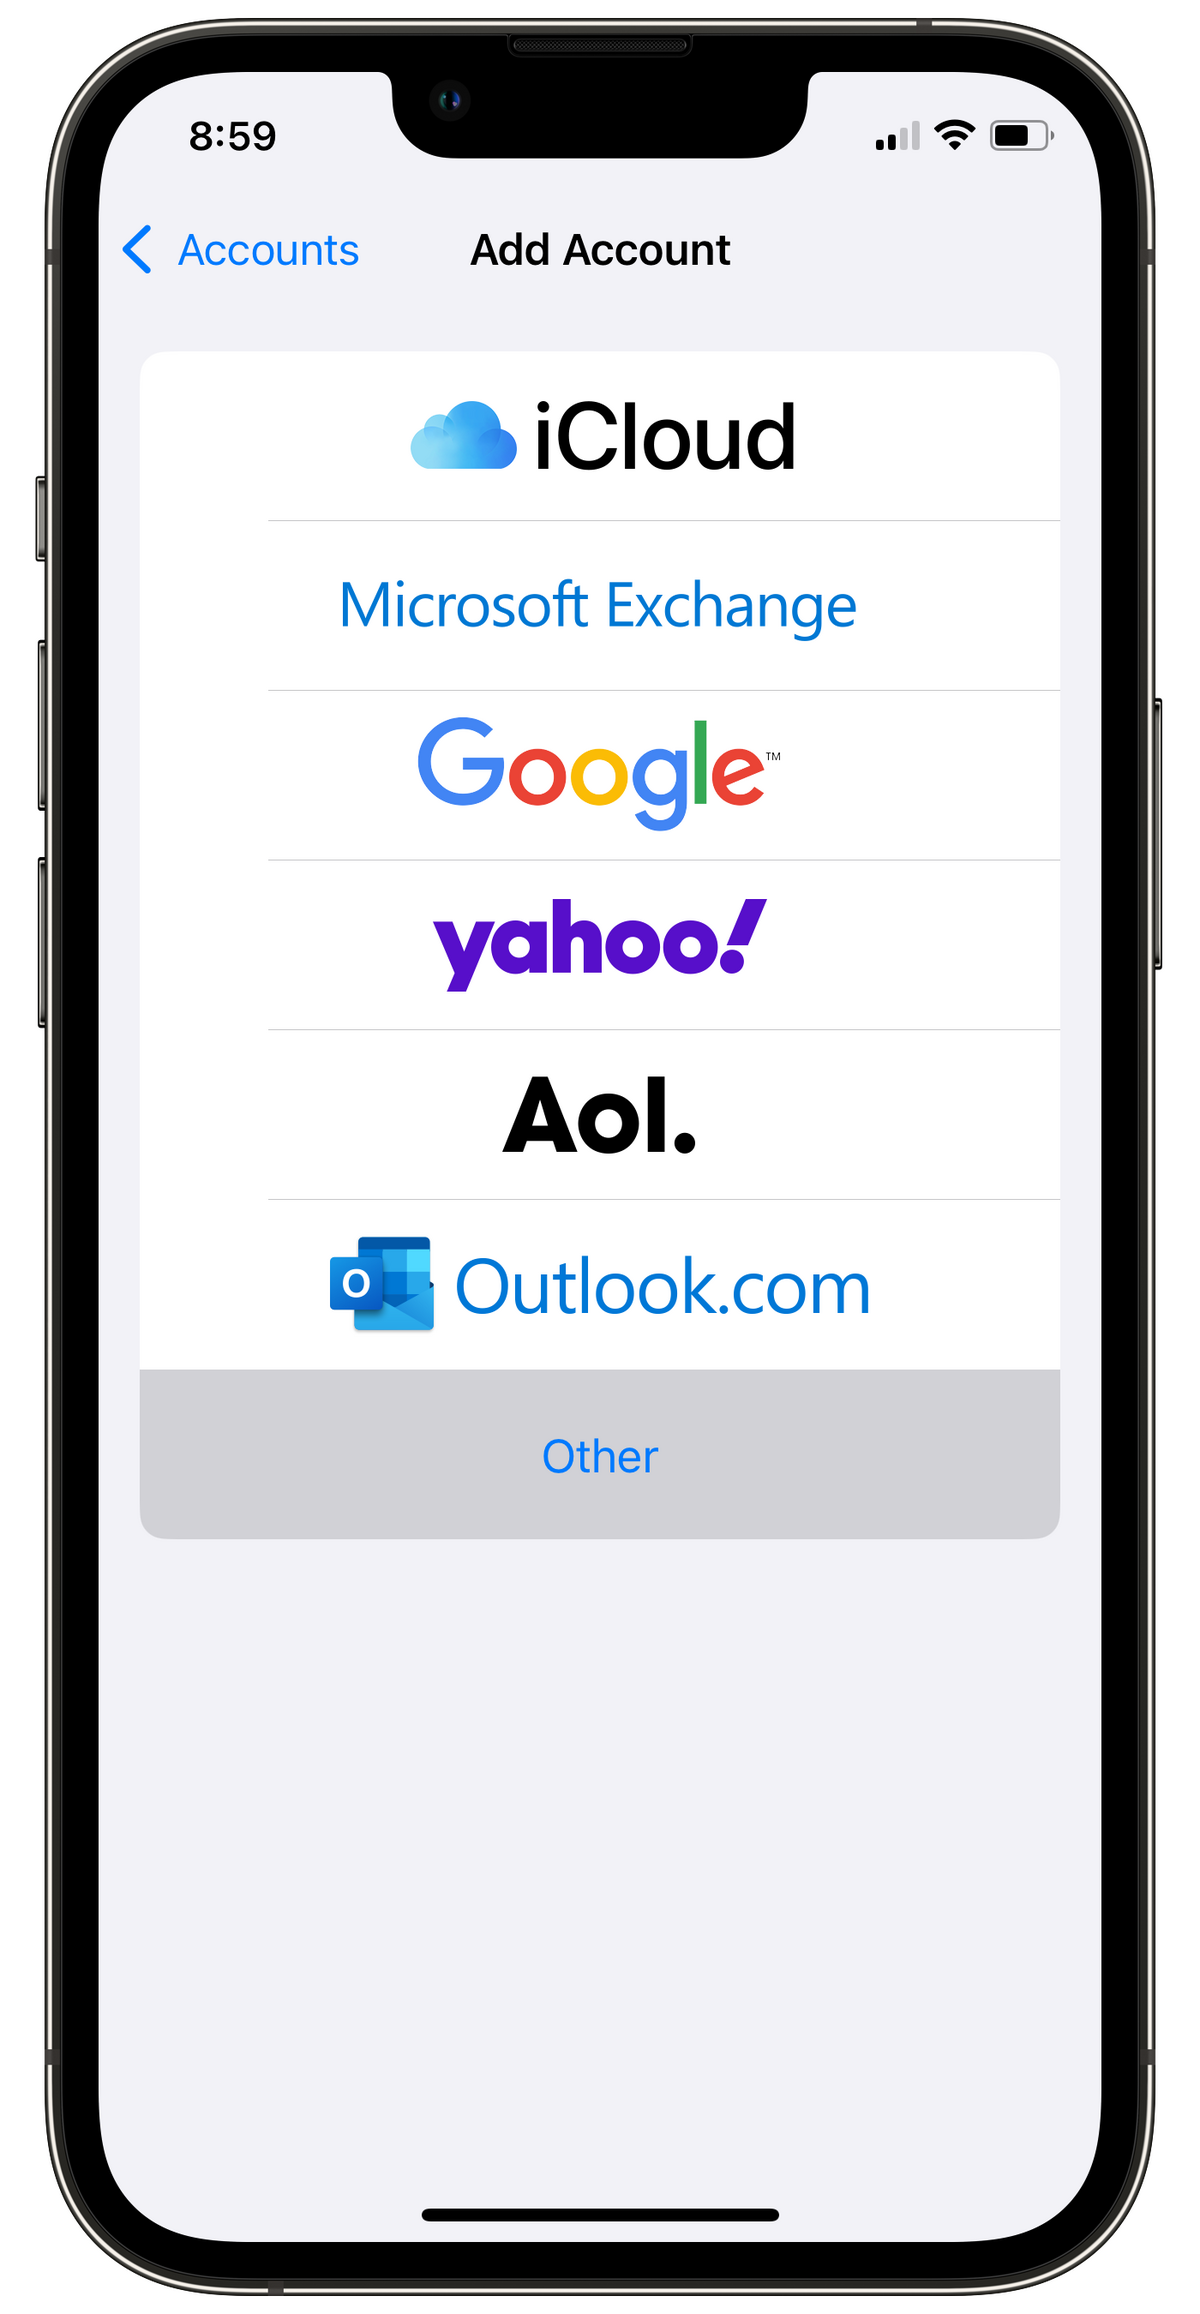
- Tap Mail Accounts > Add Account > Other > Add Mail Account.


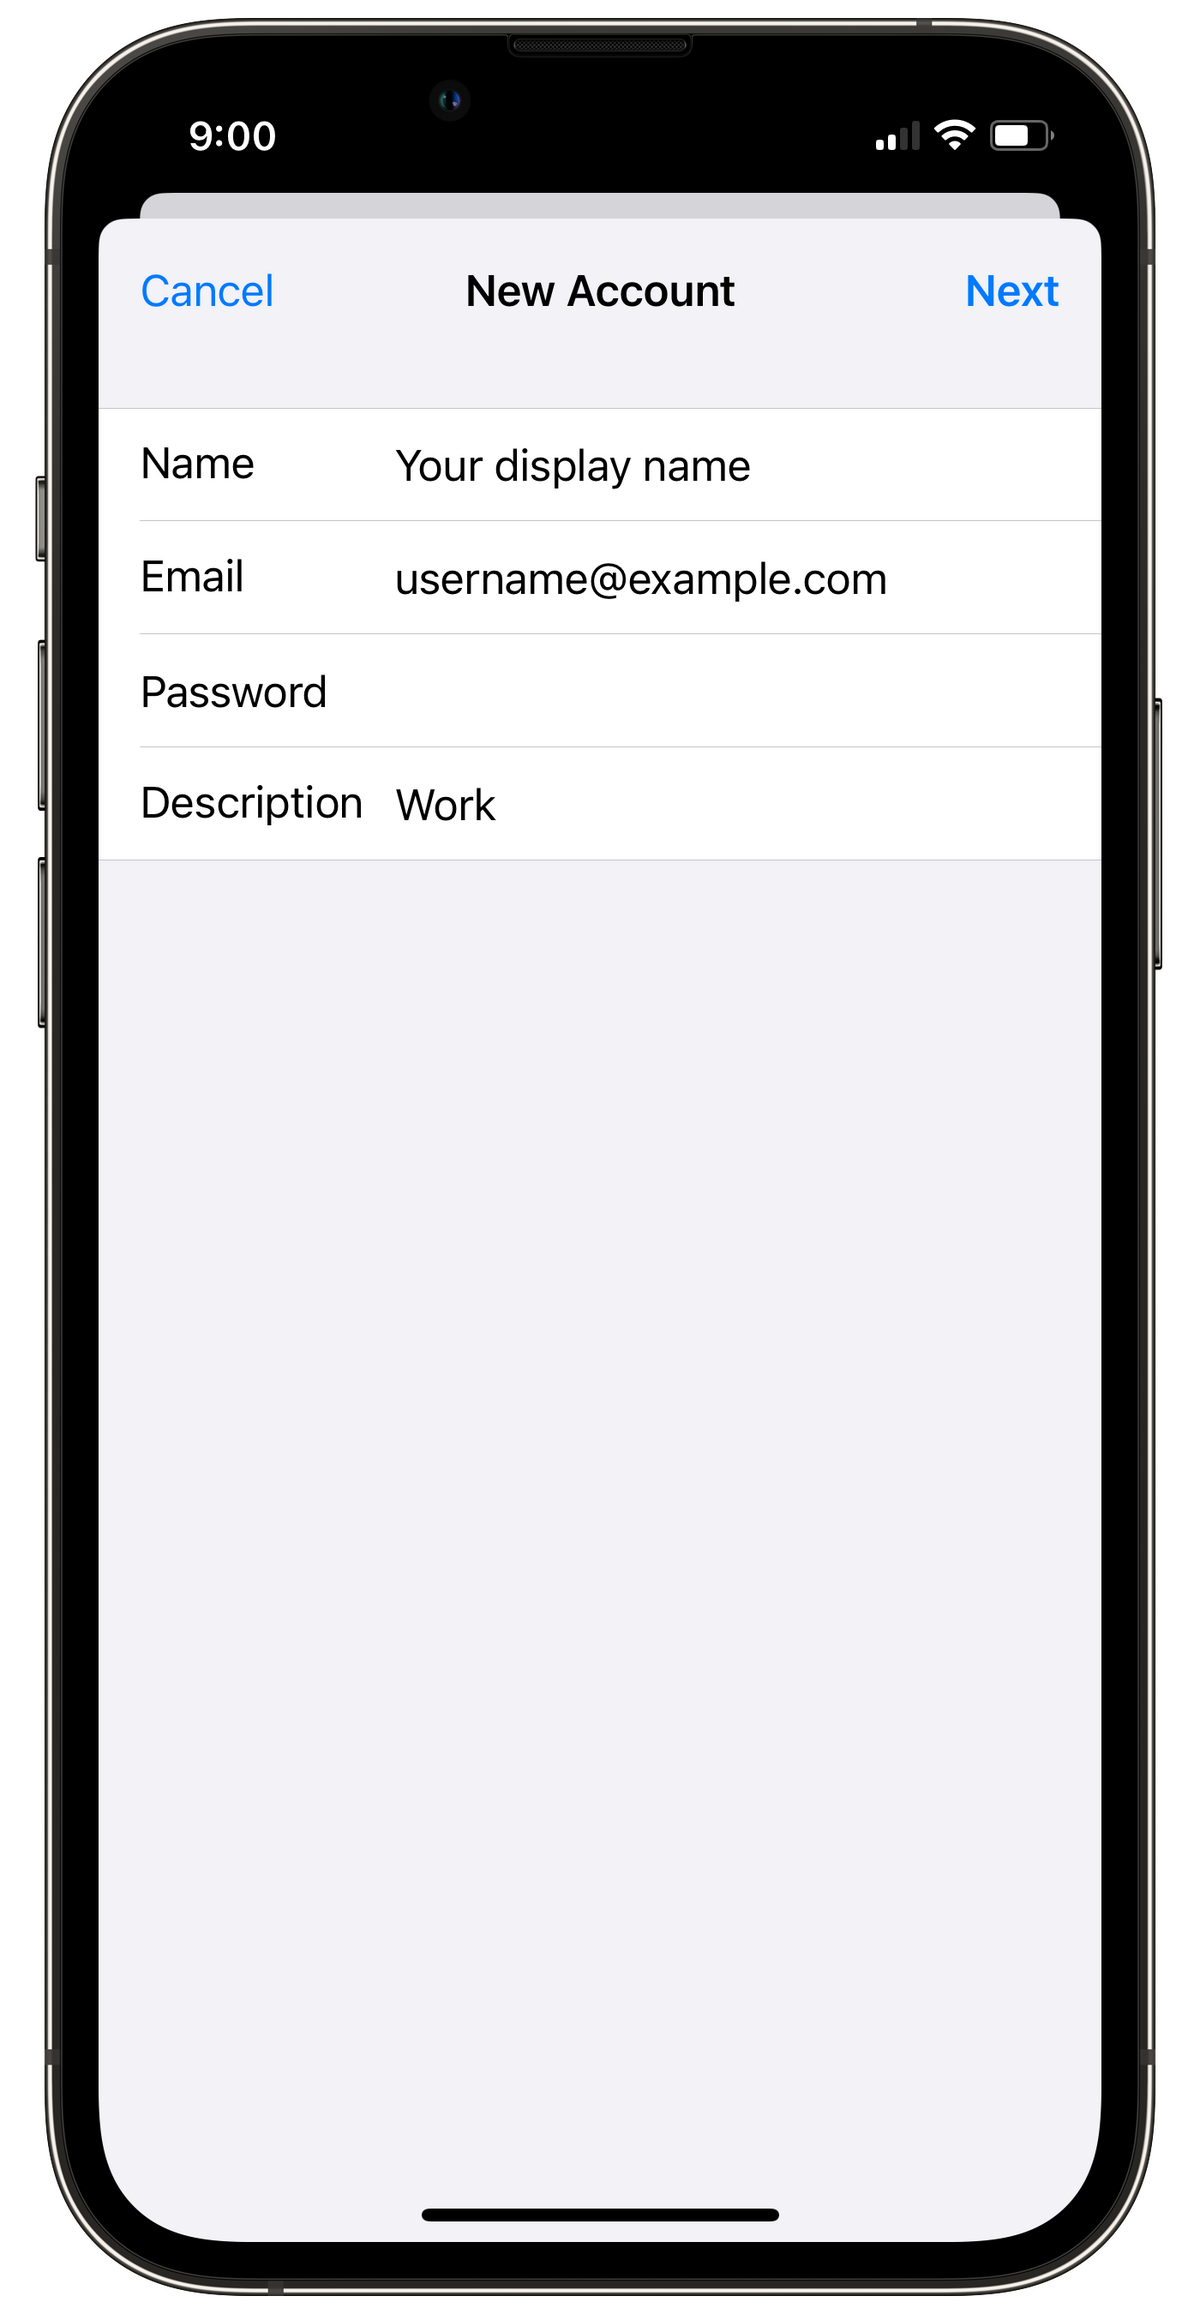
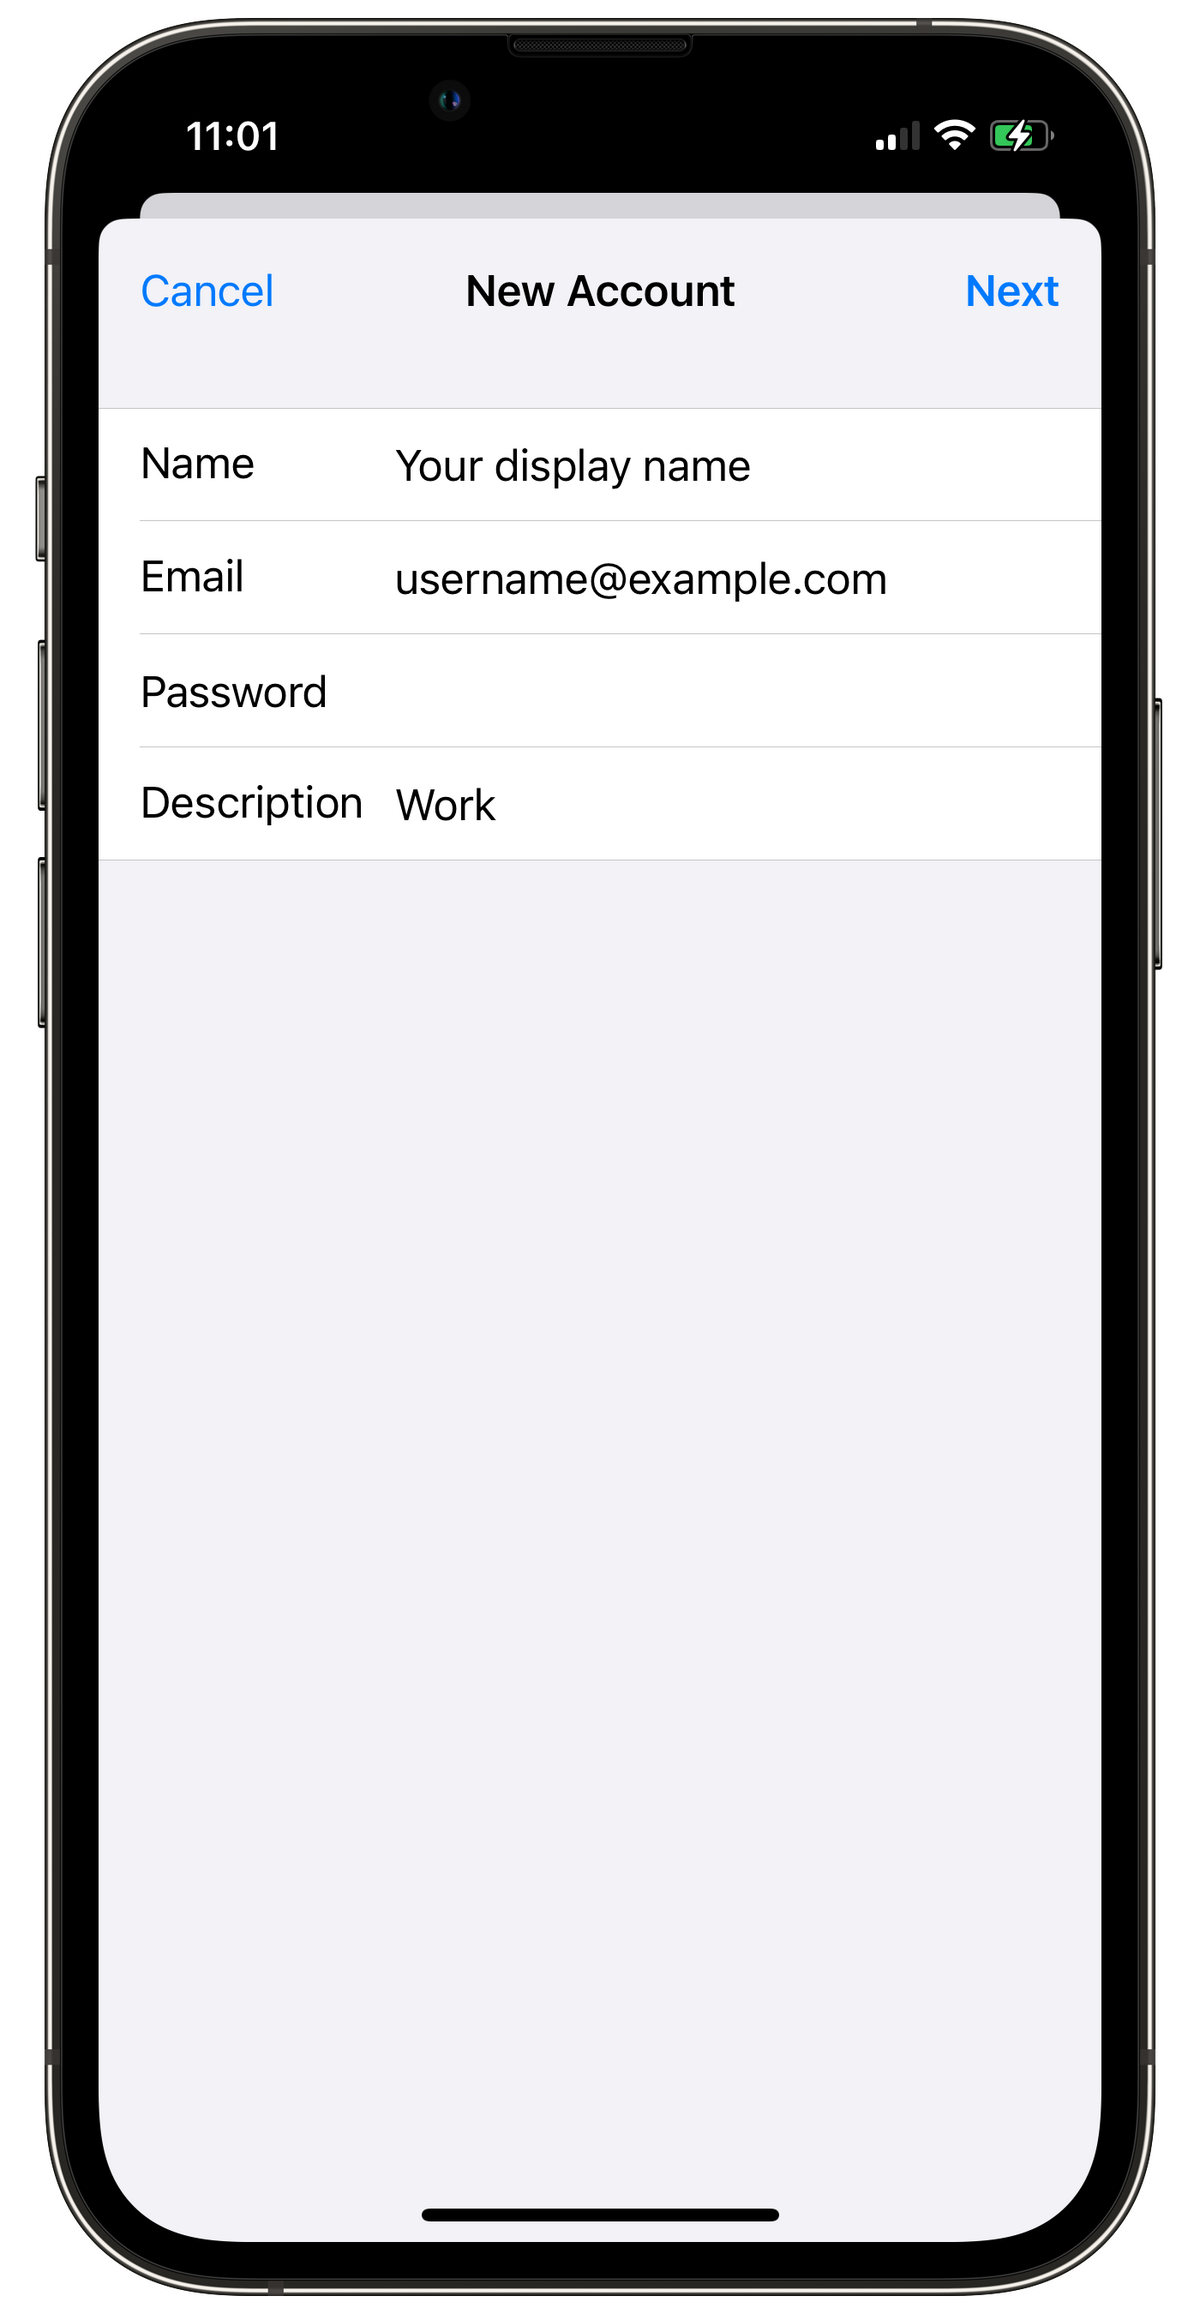
2. Enter Account Information:
- Name: Your display name (appears in sent emails)
- Email: username@example.com
- Password: Your email password
- Description: Label the account (e.g., "Work" or "Personal")
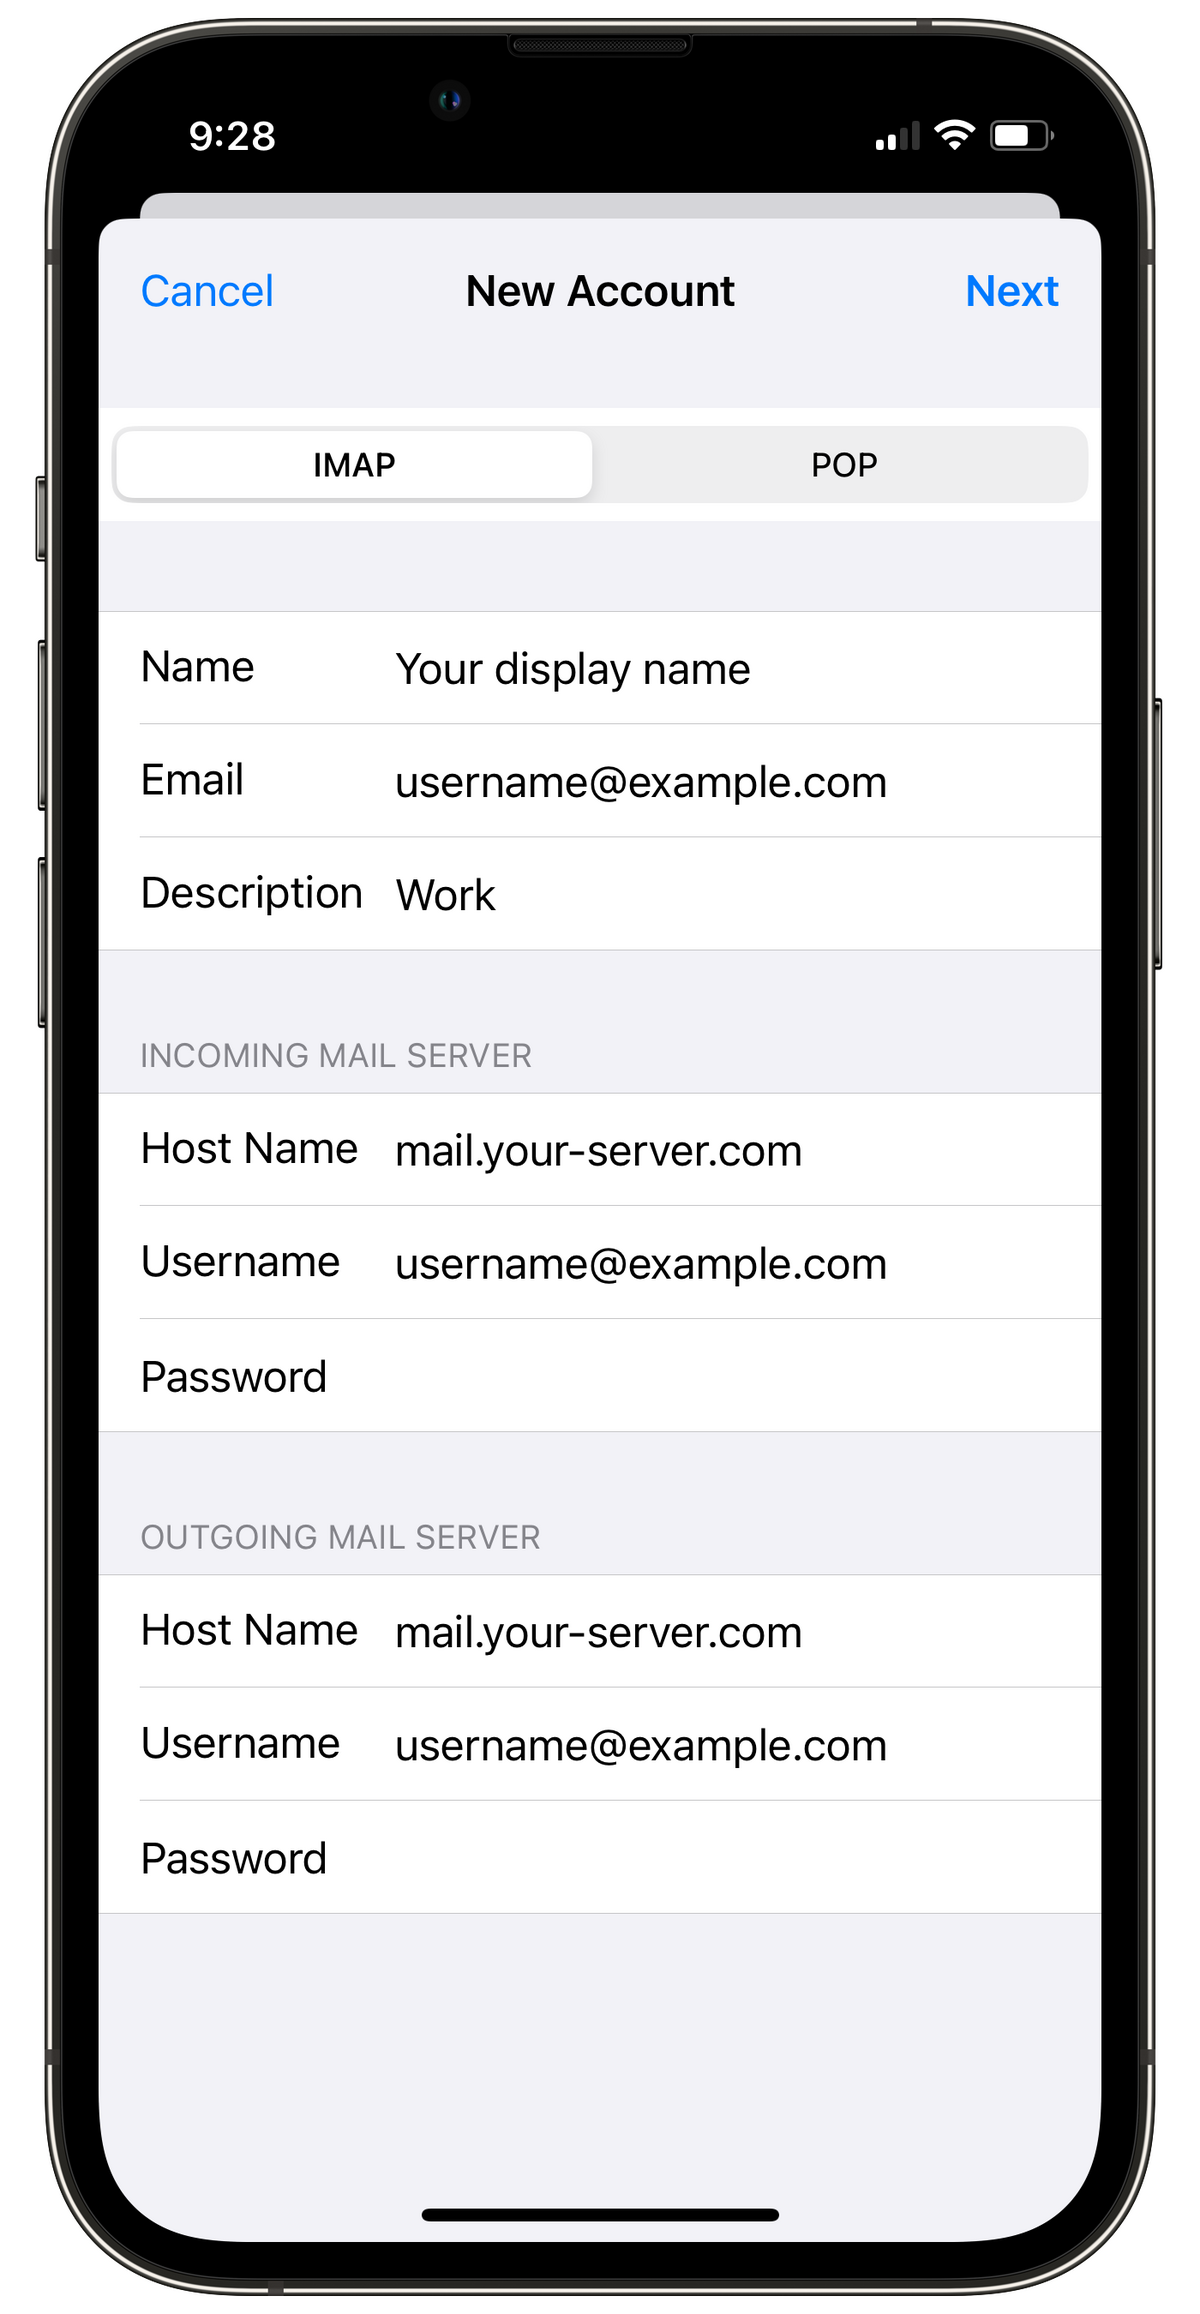
3. Configure Server Settings:
Choose IMAP and enter the following:
Incoming Mail Server:
- Host Name: mail.your-server.com
- Username: username@example.com
- Password: Your email password
Outgoing Mail Server:
- Host Name: mail.your-server.com
- Username: username@example.com
- Password: Your email password
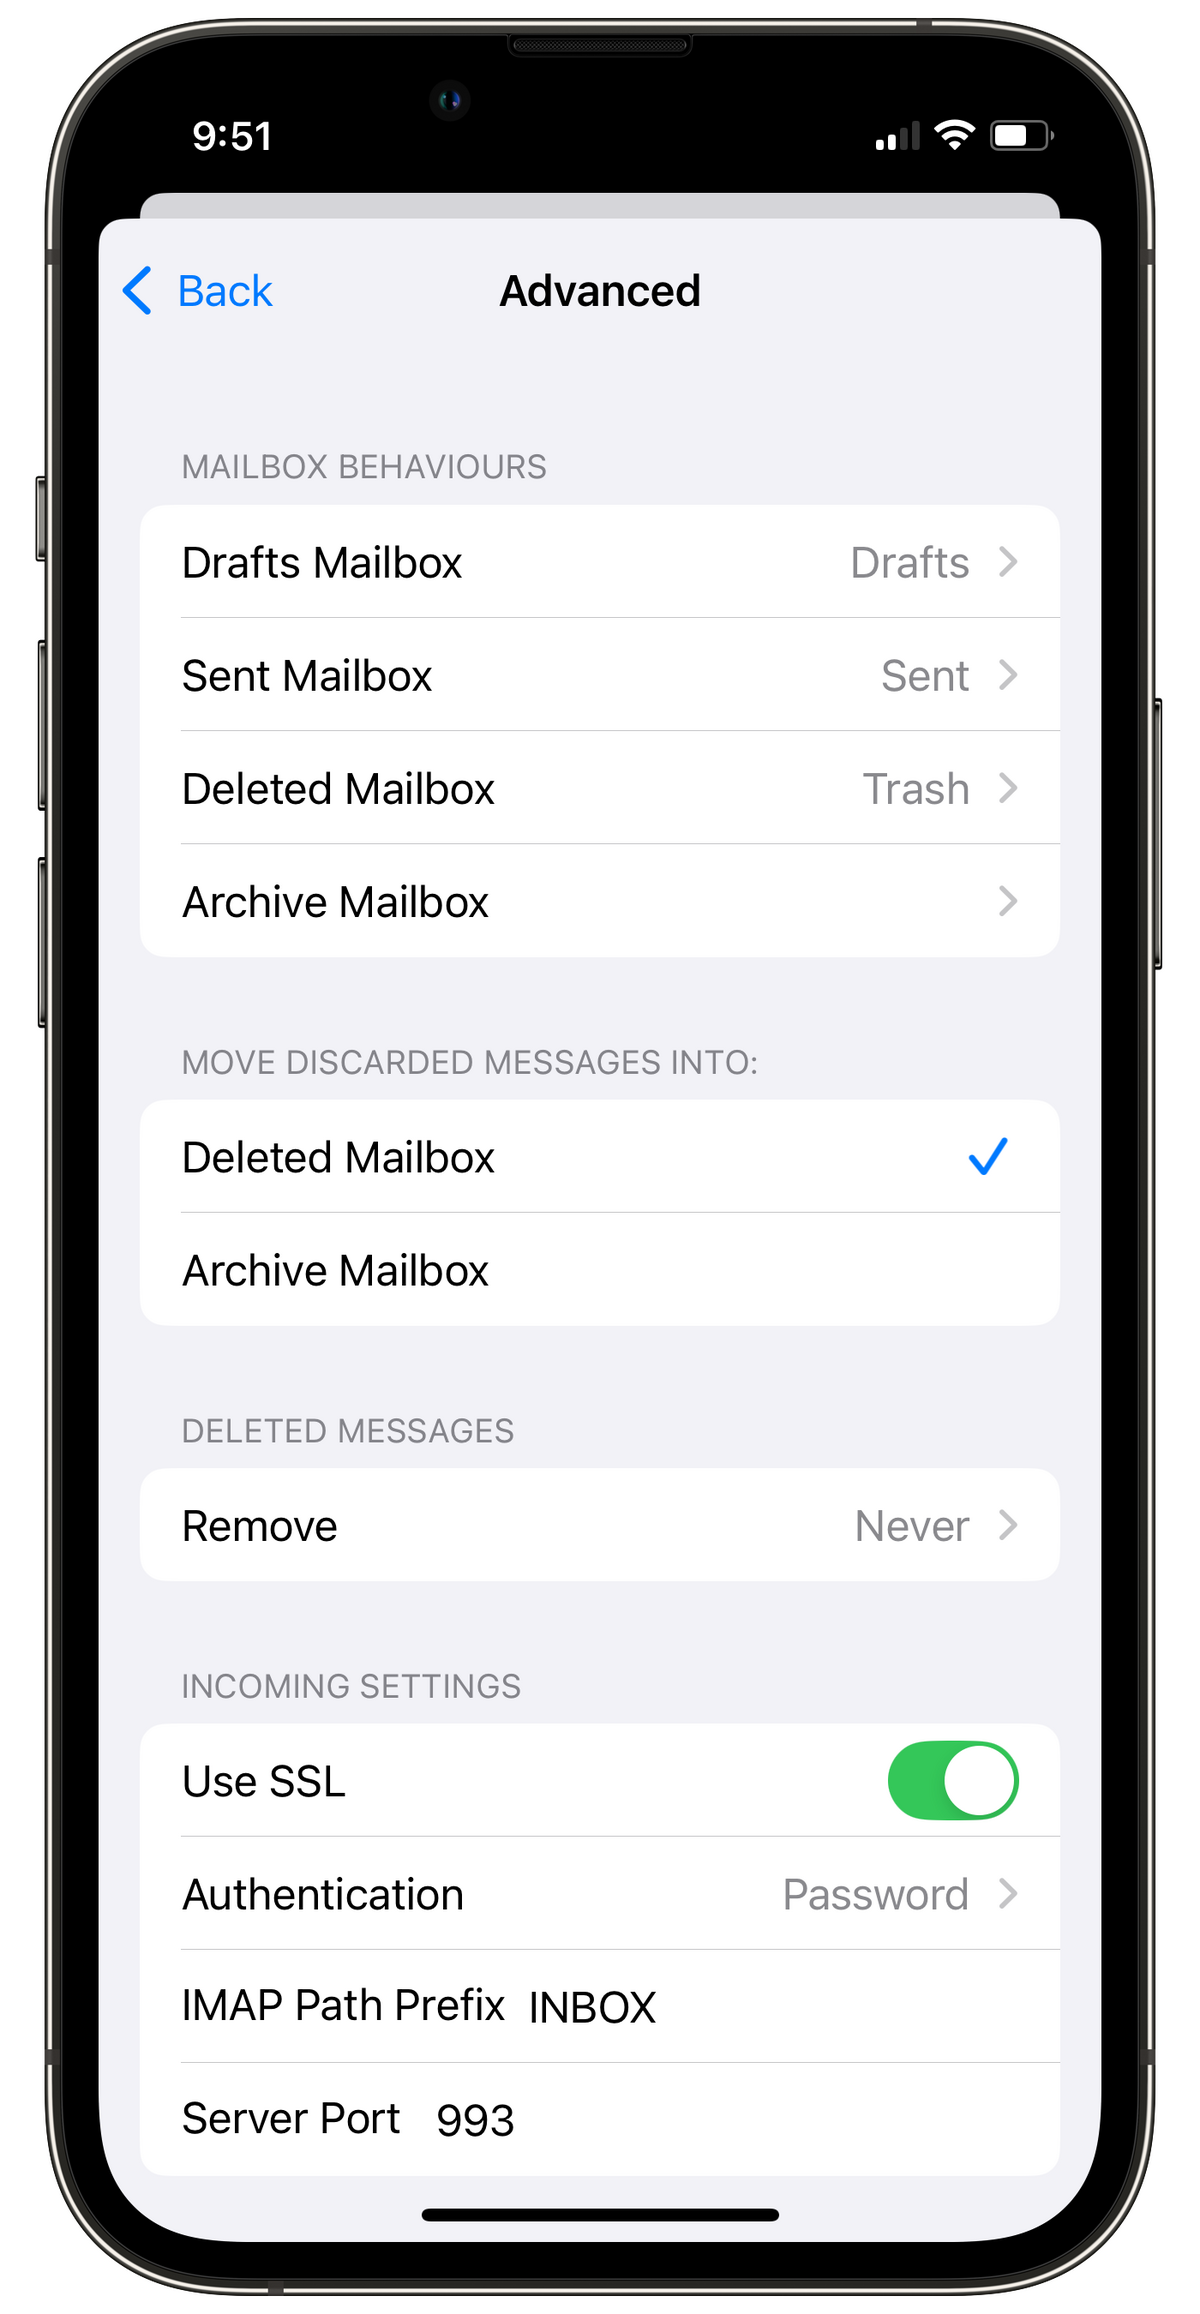
4. Adjust Advanced Settings:
- Go to Accounts > Account Settings > Advanced.
- Set IMAP Path Prefix to INBOX (all caps).
- Under Mailbox Behaviors, sync these folders to the server:
- Drafts Mailbox → Drafts
- Sent Mailbox → Sent
- Deleted Mailbox → Trash
5. Save and Finish:
- Tap <Back and return to the previous screen.
- Tap Done to complete the setup.
Your email account is now configured!
Apple iPhone iOS 17 / iOS 18 (POP3 & SMTP over SSL)
To configure your iPhone for sending and receiving emails using POP and SMTP over SSL, follow these steps:
Before You Start:
- Email Address: Replace username@example.com with your actual email address.
- Server Host: Replace mail.your-server.com with your server's host name
1. Add a Mail Account:
- Go to Settings > Apps > Mail.

- Tap Mail Accounts > Add Account > Other > Add Mail Account.


2. Enter Account Information:
- Name: Your display name (appears in sent emails)
- Email: username@example.com
- Password: Your email password
- Description: Label the account (e.g., "Work" or "Personal")
3. Configure Server Settings:
Choose POP and enter the following:
Incoming Mail Server:
- Host Name: mail.your-server.com
- Username: username@example.com
- Password: Your email password
Outgoing Mail Server:
- Host Name: mail.your-server.com
- Username: username@example.com
- Password: Your email password
4. Save and Finish:
- Tap Done to complete the setup.
Your email account is now configured!
You may miss some e-mail messages if you use POP3 to access a mailbox that has SpamAssassin enabled for it.
Legend Web Works provides cloud based email (webmail).
We are not an IT Company and not qualified to set up or troubleshoot your third party software settings or functionality. Please work with the person in charge of IT for your company to configure your devices properly.
If you do not have an in house IT provider we recommend these IT Companies:
ProSource
800.842.7636
OR
Ryan Professional Services, LLC
513.399.7387