2016
Our normal business hours are Monday - Friday 9am - 5pm EST.
If you have a true business emergency related to your website after our normal business hours; please email urgent@legendwebworks.com.
POP3 & SMTP OVER SSL
To configure Microsoft Outlook 2016 to send and receive email with the POP3 protocol over SSL, please follow the steps below. Please replace:
username@example.com with your email address
example.com with your domain name
your_server.com with your server's host name
1. Open Microsoft Outlook 2016.
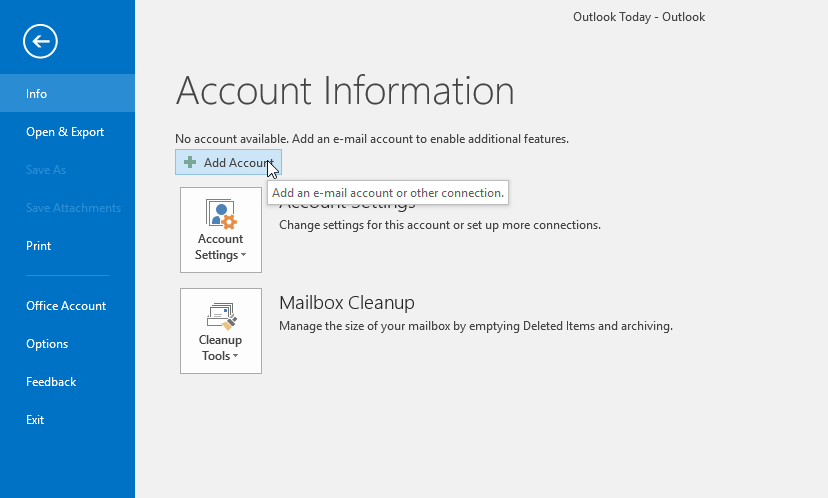
2. Choose "File" -> "Info" -> "Add Account".

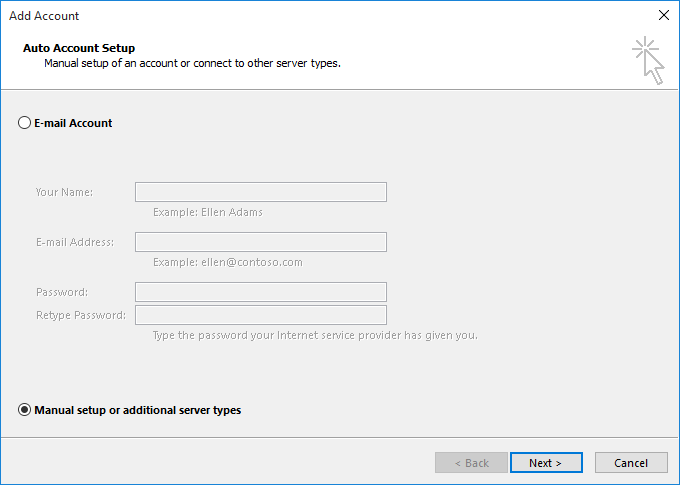
3. Select "Manual setup or additional server types" and click "Next".

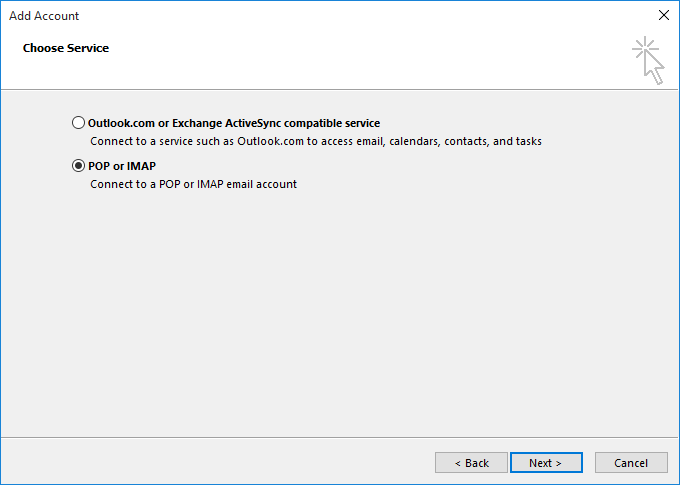
4. Choose "POP or IMAP" and click "Next".

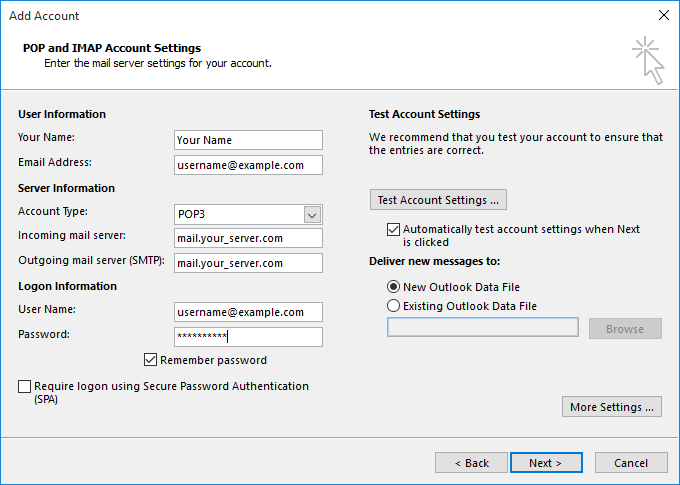
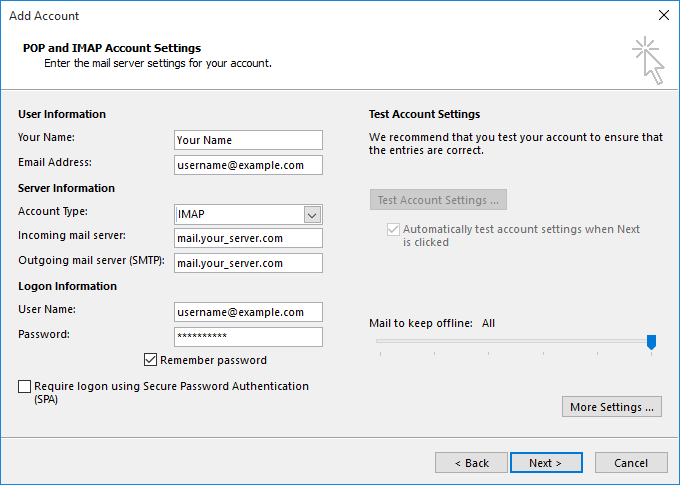
5. In the "Your name" field you should enter the name which you would like to appear on the messages you send.
You need to enter your e-mail address username@example.com in the "Email Address" field.
For incoming and outgoing mail servers you should use mail.your_server.com.
Enter username@example.com in the "User Name" field. In the "Password" field you need to enter the current password for this particular mailbox.
Leave the "Require logon using Secure Password Authentication (SPA)" option unchecked.
You can leave the "Automatically test account settings when Next is clicked" option checked, in order to easily verify if your configuration is done correctly.
The "Deliver new messages to" option allows you to specify if you want the new account to have a new Outlook data file (the default option) or if you prefer to use an existing data file. The second option is useful if you want to receive the messages of multiple pop accounts into a single Outlook folder. If you are unsure, use the default selection.
Click "More Settings ...".
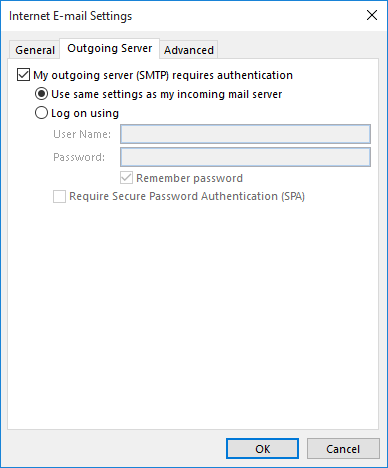
6. Click on the "Outgoing Server" tab. Mark the "My outgoing server (SMTP) requires authentication" option and leave the default "Use same settings as my incoming mail server" option selected.
7. Click on the "Advanced" tab.
Mark the "This server requires an encrypted connection (SSL)" option. The incoming server port will be automatically changed to 995.
Set the "Outgoing server (SMTP)" port to 587.
Specify "TLS" at the "Use the following type of encrypted connection" setting.
Make your selections under the "Delivery" section on how to treat the messages on the server after they are downloaded on your computer.
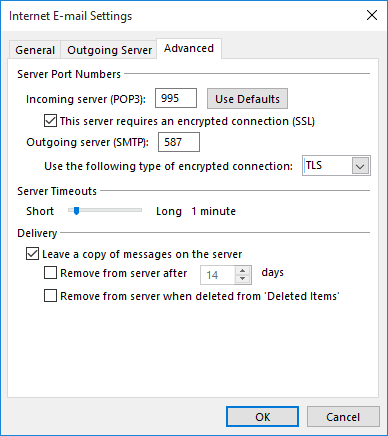
Click "OK".
8. Click "Next". The account settings will be tested. Click "Close" and then "Finish".
IMAP & SMTP OVER SSL
To configure Microsoft Outlook 2016 to send and receive email with the IMAP protocol over SSL, please follow the steps below. Please replace:
username@example.com with your email address
example.com with your domain name
your_server.com with your server's host name
1. Open Microsoft Outlook 2016.
2. Choose "File" -> "Info" -> "Add Account".

3. Select "Manual setup or additional server types" and click "Next".
4. Choose "POP or IMAP" and click "Next".
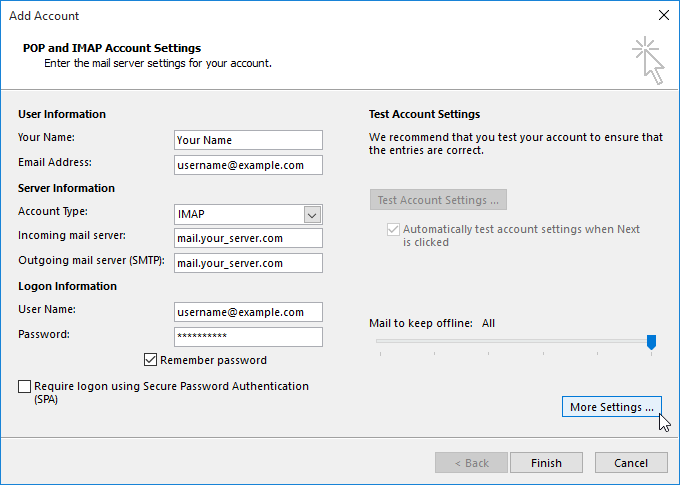
5. In the "Your name" field you should enter the name which you would like to appear on the messages you send.
You need to enter your e-mail address username@example.com in the "Email Address" field.
For incoming and outgoing mail servers you should use mail.your_server.com.
Enter username@example.com in the "User Name" field. In the "Password" field you need to enter the current password for this particular mailbox.
Set "Account Type" to IMAP.
Leave the "Require logon using Secure Password Authentication (SPA)" option unchecked.
Click "More Settings ...".
6. Click on the "Outgoing Server" tab. Mark the "My outgoing server (SMTP) requires authentication" option and leave the default "Use same settings as my incoming mail server" option selected.
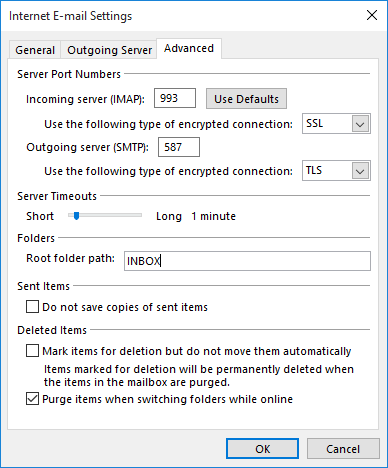
7. Click on the "Advanced" tab.
The encryption needs to be "SSL" for the Incoming server and "TLS" for the Outgoing server.
Set the "Outgoing server (SMTP)" port to 587.
You need to specify the following value in capital letters in the "Root folder path" text field:
INBOX

Click "OK".
8. Click "Next". The account settings will be tested. Click "Close" and then "Finish".
AUTODISCOVER IMAP & SMTP OVER SSL
To configure Microsoft Outlook 2016 to send and receive email with the IMAP protocol over SSL, please follow the steps below. Please replace:
username@example.com with your email address
example.com with your domain name
your_server.com with your server's host name
IMPORTANT: Autodiscover (automatic email configuration) will be available for your Outlook only if the hostname autodiscover.example.com resolves to the IP address of the server where your account is hosted with us. The subdomain itself must not exist in the Subdomains section of the hosting Control Panel.
1. Open Microsoft Outlook 2016.
2. Choose "File" -> "Info" -> "Add Account".
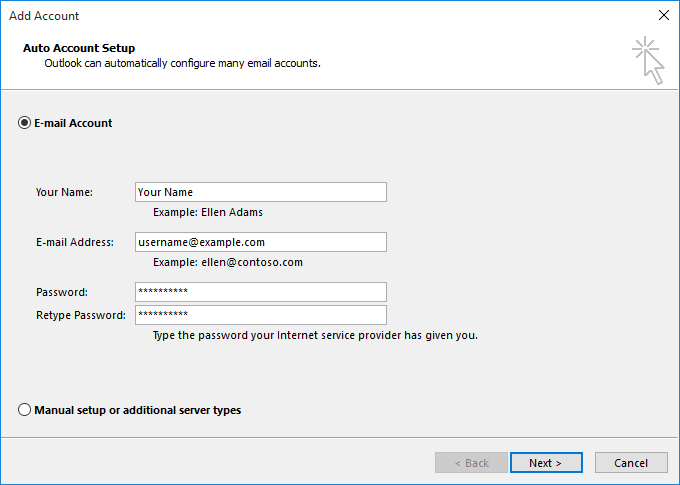
3. Select "E-mail Account".
In the "Your name" field you should enter the name which you would like to appear on the messages you send.
You need to enter your e-mail address username@example.com in the "Email Address" field.
In the "Password" and "Retype Password" fields you need to enter the current password for this particular mailbox.
Click "Next".
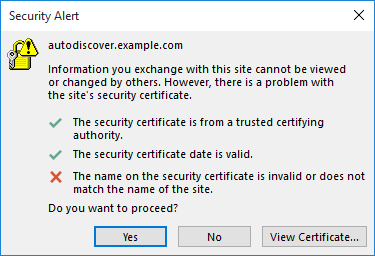
4. If you have not installed a custom SSL certificate for your autodiscover.example.com subdomain, you will see a warning that the used certificate is not issued for your domain but for the hosting server. This is a default certificate we install at all our machines, and you can proceed safely by clicking "Yes".
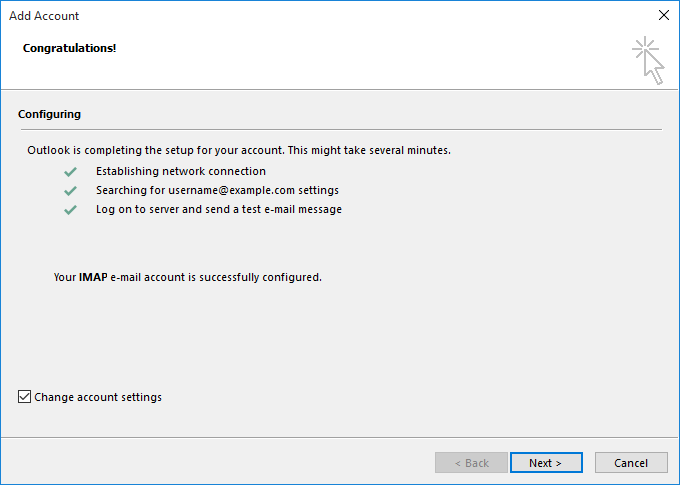
5. On the next screen check the option "Change account settings" and click "Next".
6. Click "More Settings ...".
7. Click on the "Advanced" tab.
You need to specify the following value in capital letters in the "Root folder path" text field:
INBOX
Click "OK".
8. Click "Finish". The account settings will be tested. Click "Close".
Legend Web Works provides cloud based email (webmail).
We are not an IT Company and not qualified to set up or troubleshoot your third party software settings or functionality. Please work with the person in charge of IT for your company to configure your devices properly.
If you do not have an in house IT provider we recommend these IT Companies:
ProSource
800.842.7636
OR
Ryan Professional Services, LLC
513.399.7387