Outlook Express
Our normal business hours are Monday - Friday 9am - 5pm EST.
If you have a true business emergency related to your website after our normal business hours; please email urgent@legendwebworks.com.
OUTLOOK EXPRESS (POP3 & SMTP OVER SSL)
To configure Outlook Express to send and receive email using our servers using POP3 and SMTP over SSL/TLS, please follow the steps below. Please replace:
user@example.com with your email address
example.com with your domain name
your_server.com with your server's host name
1. Open Outlook Express.
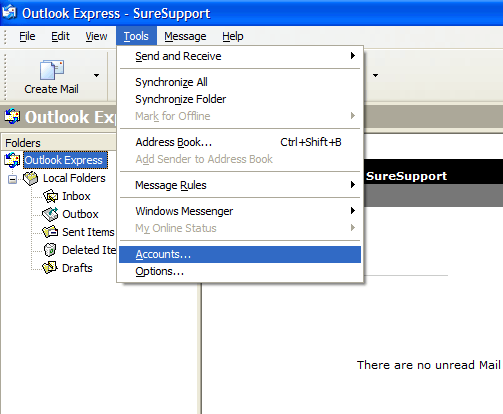
2. Choose "Tools" -> "Accounts".
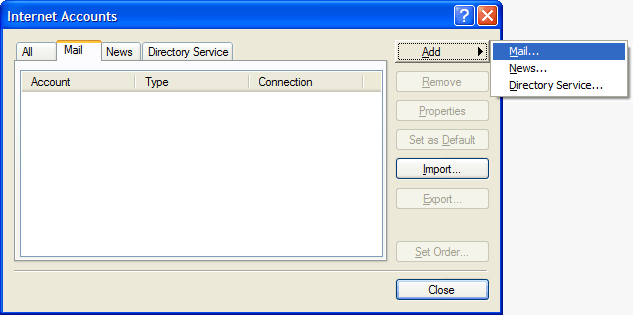
3. Choose "Mail" -> "Add" -> "Mail".
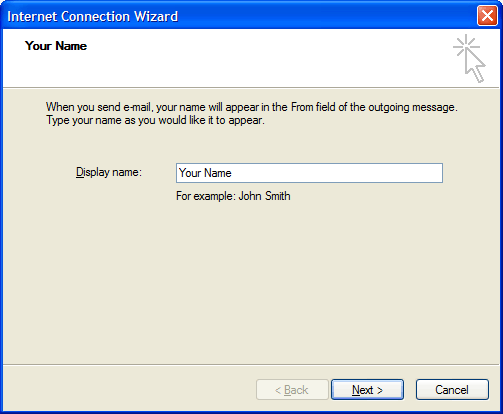
4. In the "Display Name" field you should enter the name which you would like to appear on the messages you send.
Click on the "Next" button.
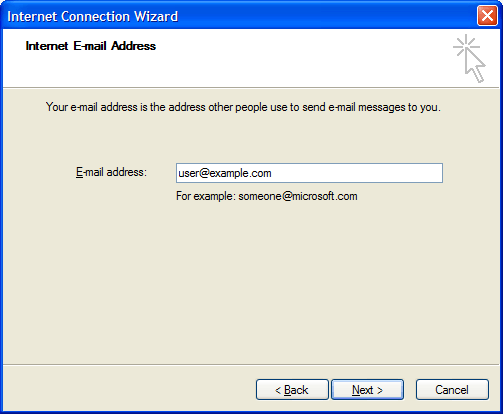
5. Enter your e-mail address user@example.com in the "E-mail address" field.
Click on the "Next" button.
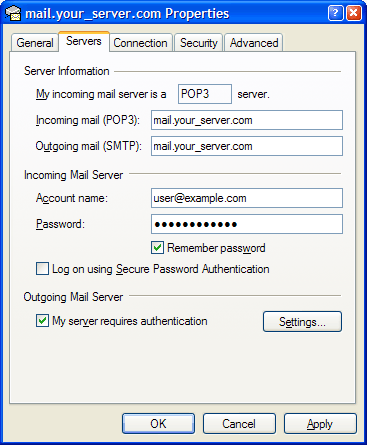
6. Set the type of the incoming mail server to POP3. For incoming and outgoing mail servers you should use mail.your_server.com
Click on the "Next" button.
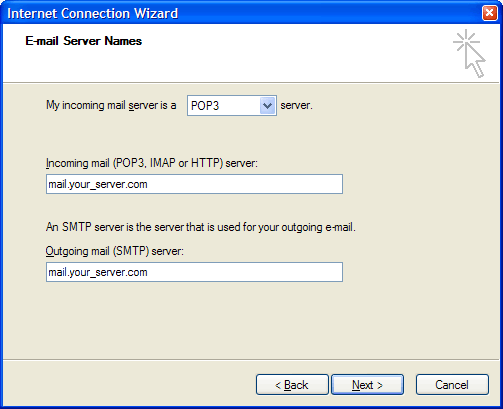
7. Enter user@example.com in the "Account Name" field. In the "Password" field you need to enter the current password for this particular mailbox.
Make sure that you leave the "Log on using Secure Password Authentication" (SPA) option unchecked.
Click on the "Next" button.
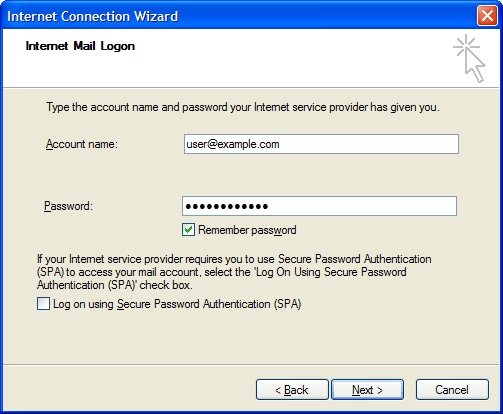
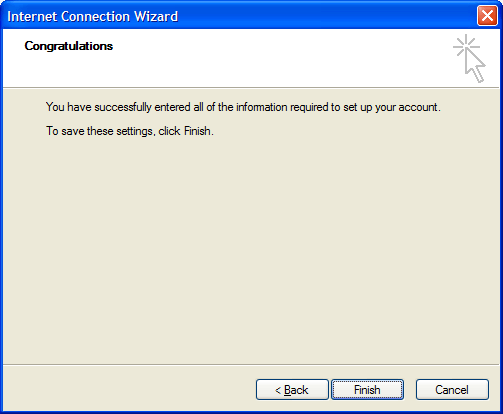
8. Click on "Finish".
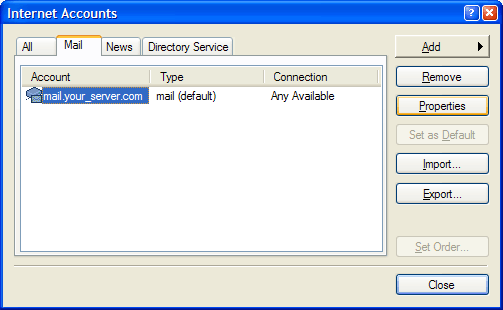
9. Select the account you have just created and click on "Properties".
10. Click on "Servers" and check the "My server requires authentication" option.
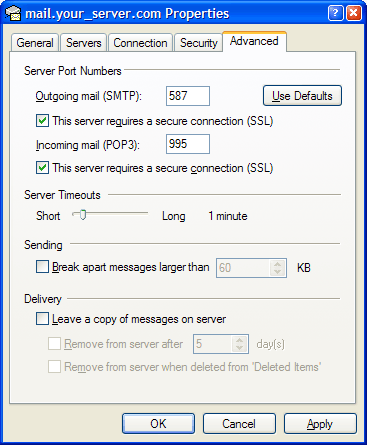
11. Click on the "Advanced" tab and set the "Outgoing mail (SMTP)" port to 587.
Click on "OK".
OUTLOOK EXPRESS (IMAP & SMTP OVER SSL)
To configure Outlook Express to send and receive email using our servers using IMAP and SMTP over SSL/TLS, please follow the steps below. Please replace:
user@example.com with your email address
example.com with your domain name
your_server.com with your server's host name
1. Open Outlook Express.
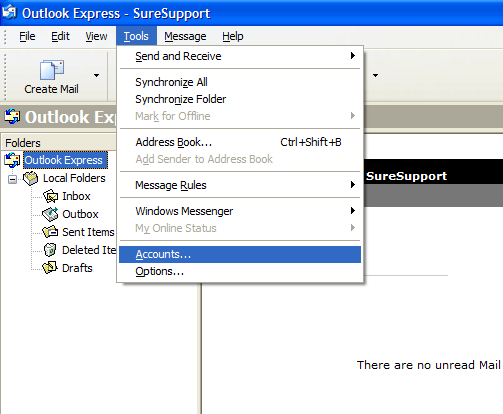
2. Choose "Tools" -> "Accounts".
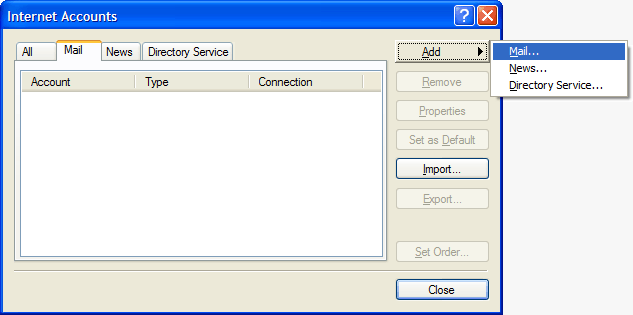
3. Choose "Mail" -> "Add" -> "Mail".
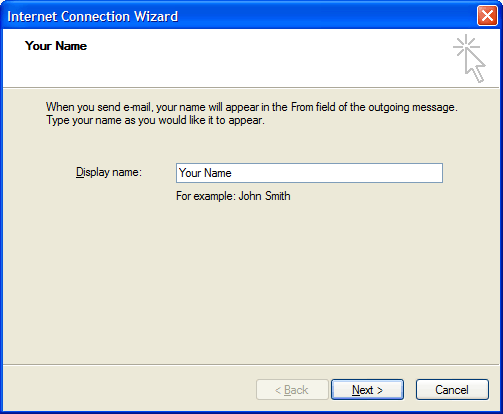
4. In the "Display Name" field you should enter the name you would like to appear on the messages you send.
Click on the "Next" button.
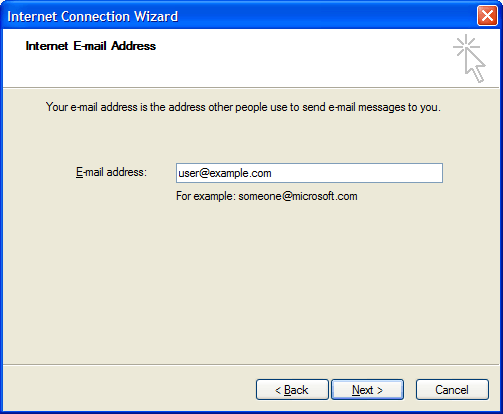
5. Enter your e-mail address user@example.com in the "E-mail address" field.
Click on the "Next" button.
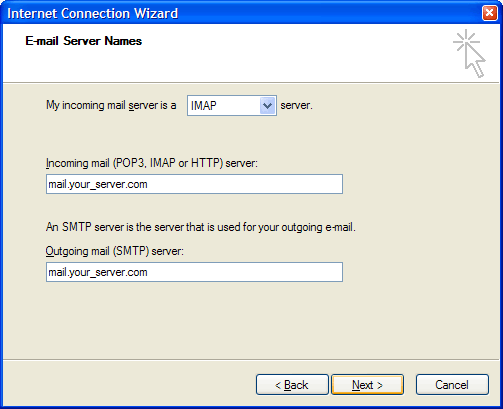
6. Set the type of the incoming mail server to IMAP. For incoming and outgoing mail servers you should use mail.your_server.com
Click on the "Next" button.
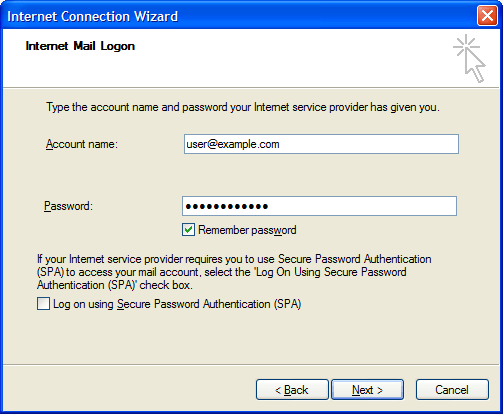
7. Enter user@example.com in the "Account Name" field. In the "Password" field you need to enter the current password for this particular mailbox.
Make sure that you leave the "Log on using Secure Password Authentication" (SPA) option unchecked.
Click on the "Next" button.
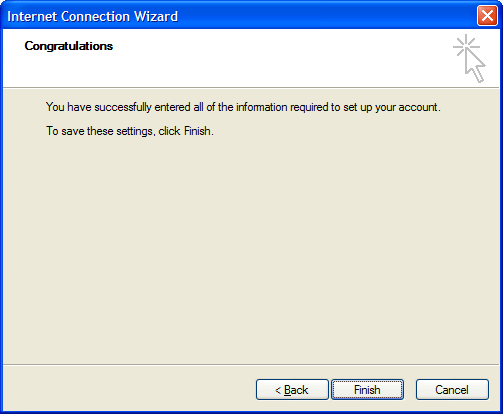
8. Click on "Finish".
9. Select the account you have just created and click on "Properties".

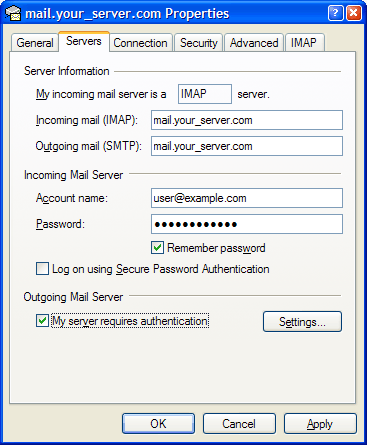
10. Click on "Servers" and check the "My server requires authentication" option.
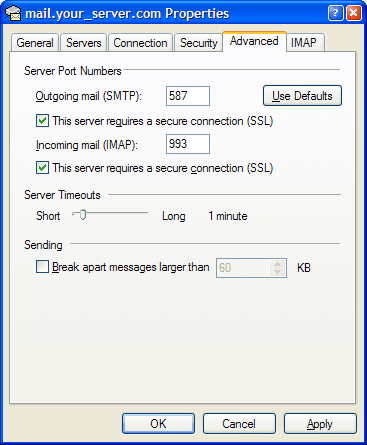
11. Click on the "Advanced" tab and set the "Outgoing mail (SMTP)" port to 587.
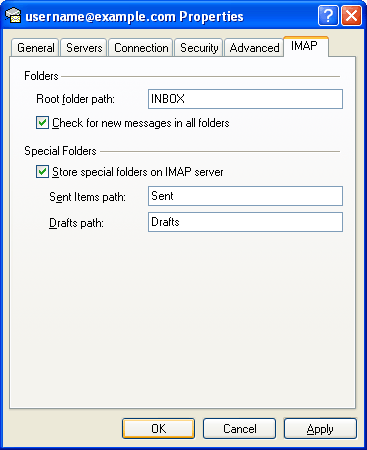
12. Click on "IMAP" and enter the following value in the "Root folder path" text area:
INBOX
Be sure to enter this value in capital letters.
Enter "Sent" in the "Sent Items path:" field and "Drafts" in the "Drafts path:" field.
Click on "OK".
13. Click on "Close".
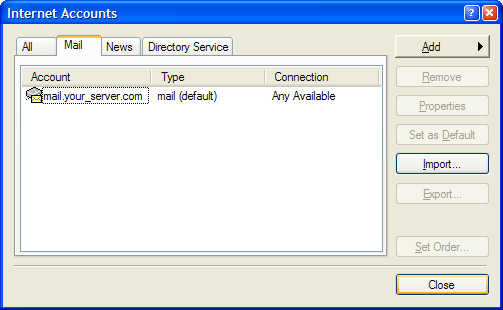
14. You will be prompted to download folders from the mail server you just added. Click on "Yes" and once the folders show up, click on "OK".

Legend Web Works provides cloud based email (webmail).
We are not an IT Company and not qualified to set up or troubleshoot your third party software settings or functionality. Please work with the person in charge of IT for your company to configure your devices properly.
If you do not have an in house IT provider we recommend these IT Companies:
ProSource
800.842.7636
OR
Ryan Professional Services, LLC
513.399.7387

